My little crafting world....


Hi all
I'm a complete craft addict! I have a small business called Surrey Crafts teaching craft workshops from my studio in Esher, Surrey and at venues around the country. I teach mixed media, decorative painting, card making and papercrafts, jewellery making and creative embroidery classes. If you'd like to find out more just leave a comment, or take a look at my other social media pages:
Facebook: https://www.facebook.com/surrey.crafts
Instagram: https://www.instagram.com/surreycrafts/
Pinterest: https://www.pinterest.co.uk/surreycrafts/
Crafty hugs & stuff
Suz

xx

Sunday, 15 March 2020

ATC Mini Book

A fun, quick and easy ATC Concertina Mini Book for Andy's Creative Team, using Andy Skinner's stamps and transfers, along with a few other fab Creative Expressions goodies and, as usual a bit of upcycling! Here are the front and back covers, and then a photo tutorial of how I made it.


I've just got my hands on some of Andy's new stamps, along with some other Creative Expressions goodies. I had so much fun with this, it was quick, easy and total art therapy, a real antidote to all the troubles of the world.
 Intense Pigment stains used on old curtain lining. It's a beautiful, smooth and strong material and the pigment stains are amazing.
 I glued the fabric to an ATC sized piece of card using a slightly diluted Quick Grab Glue applied with a brush.
 I cut and folded card to make a concertina insert, you could use any card suitable for mixed media.
 Pigment inks and white chalk paint to colour both sides of the card.
 Keep layering colours with a brayer until you like the look.
 Once the curtain fabric was dry I stuck on bits of vintage book pages again using diluted 'Quick Grab Glue', then tore the paper back when it had dried.
 Andy's Eye Spy stamp embossed with some cosmic shimmer Viola Black Aurora powder. Loved how it looks so different on the fabric to the paper.Then I added some transfers - YES transfers work on fabric too!!! They are flippin awesome!
 Then I started to play. I used three of Andy's embossing powders to see how they looked over the paints, plus the darker Aurora.The Supa Nova on the far left was my favourite - a granite look, strong, but not overpowering (which the Aurora was for this bit).
 Then some mark making with paints, lids and the side of another card ATC.
 I wanted this book to be reversible, so the back would also be an alternative cover. I had another ATC painted with a mixture of white chalk paint, quinacridone gold and a tiny bit of raw umber which were just clean ups from another project.
 Stamped Skull of Spades, added torn text from book pages...
 a bit of Gold Treasure Gilding Polish, then an embellishment from C E Cogs and Gears set - embossed with Supa Nova
 Then I glued the embellishment over the skull. Always adapt stamps as you need them. And a gem in the middle!
 Then onto the inside. I added LOADS of transfers along one of the sides. Then glued it to the ATC cover.
 On the other side I added text that was all from Andy's 'Create' stamp which I'd stamped onto white card, cut out and stuck down.
  Closer pics of inside...
 Pics of the other side, and all the lush transfers!
  And back to the front.....if you know what I mean, with a few more close ups before all the product info...
Then a very last thing I did....re stamp the Eye Spy sentiment and stick it over the previous one, the smudged word was bugging me! Much happier now. :-)
 I loved playing with this.
Thanks so much for looking. If you'd like to see more of the posts from my fab teamies, or all the direct links to the products which I've listed on my post for Andy's Creative Team, click HERE.
Suz
xxx
Products used:
Pigment paints in colours stated.
Stamps: Eye Spy/ Skull of Spades/ Memories of India/ Create
Embossing powders in colours stated
Transfers from two sets: Ephemera Emporium & French Fancy
Quick Grab Glue
Super Matt Varnish to seal both sides of the concertina insert

Thursday, 5 March 2020

Journal Page for the Craft Stamper March Blog Challenge

Hi all
Todays project for the CS blog Challenge is an A4 journal page.
There are 4 pots of Tim Holtz gorgeous Embossing Glaze to be won this month, so why not pop over to the Craft Stamper blog and take a look HERE
Here are a few pics of the process..... 
 To begin, I painted an area with a skintone, then stamped over it. 
I stamped again onto white paper, cut out the eyes and stuck them on top.
 After placing a mask on top of the eye stamp, I repeatedly brayered several fluid acrylics until I had the blend of colours I liked. Then I stamped the smashed glass with Versamark ink and embossed.
 A bit of stencilling.....
Some mark making (paint and the side of a piece of card) 
Doodling with white paint pen, and a black outline smoshed around the eyes. 
I held the page upside down, placed crayons against the page and heated them 
until they melted and ran down the page. 
 Stamped out a sentiment a couple of times (which was the inspiration for the melted crayons), chopped it up and used the pink and green crayons to colour the edges.
 Stuck down the words and used a black Posca Paint Pen to edges them, then with a watery
 brush I softened the black paint. Drew around the stencilled patters with the white pen.
Some stick on ribbon down the sides (bought this from Poundland months ago) and used a 
Stabilo All pencil along both the sides of the crayon section.
 A bit more fiddling with doodles, a couple of butterflies to the sides of the eyes
 (to soften them) and that was that!
Thanks for looking. Not sure how much I like this - but I loved the process. 
Lots of stamping and melting crayons was fun!
Suz
xxx

Friday, 28 February 2020

Repurposed Brandy Glasses for Andy Skinner's Creative Team

Today's project is soooo simple.  Anyone who knows me will know that I LOVE taking things destined to be thrown away and making something useful out of them. So good bye ridiculously oversized brandy glasses and hello plant bowls!!!
Hubby also knows me so well. He was in a bar at a golf club and they were chucking these out! He asked if he could have them and brought them home to me and says 'I wondered if you could use these for something'...well I like a challenge
I'd recently been to a little 'Victoriana' exhibition in the glass house at Wisely Gardens, where they used all sorts of household items for fabulous plant displays so that's where the inspiration came from.
I mixed the AMAZING quick grab glue 50/50 with water in a little plastic pot (which I will, of course, reuse) and literally brushed it on the glass with a wide flat brush. It stuck to the glass like glue! Hahaaa, but it did; it just stayed there, didn't run off and it stayed moist long enough for me to apply pieces of torn rice paper all around the bowl. And funnyily enough, it seemed to grab those pieces of rice paper super quickly (quick grab and all that!). It also dried completely clear and is really strong too!
 I used less than one A4 piece of Andy's rice paper for each glass. Once dry I went over the whole thing again with another coat of the glue, then some watered down chalky paint to lighten the papers and bring out the texture. The layers of rice paper and glue also strengthens the glass , which is handy as I'm quite clumsy.
I added a little compost into each glass, then popped a primrose plant on top - perfect fit! A great way to brighten up a dull day. If you've got odd glasses, why not see how you could repurpose them?
Thanks for looking.
Suz

Friday, 14 February 2020

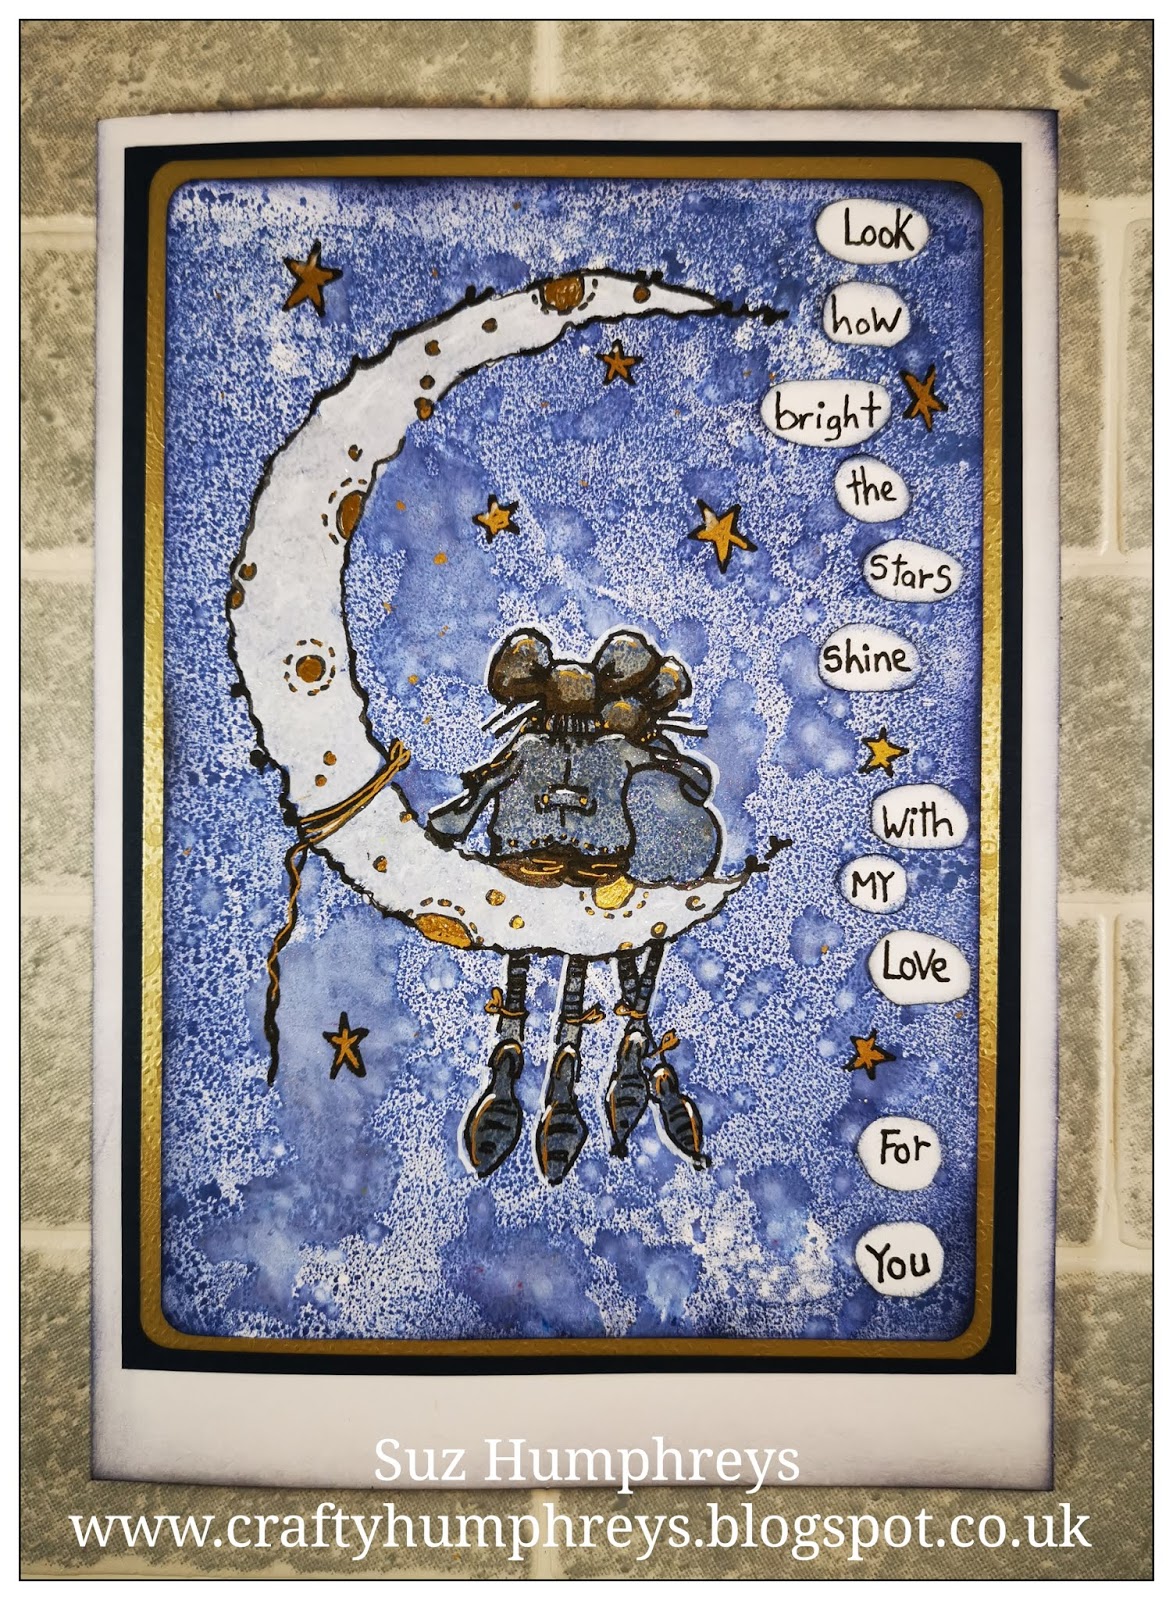
Valentines Card - look how bright the stars shine with my love for you.

A valetines card for hubby. Using a beautiful stamp by Tracy Easson.
I wanted a romantic evening for this scene.
 Distress inks, oxide and brusho for the galactic background
 Stamped out the image lining up the card in my stamp platform as I knew I'd be stamping again after a bit of work.  DecoArt paints to fill in the moon, white first, then a bit of pearl shimmer. 
Re stamped the image to get the detail on the moon. Pitt pens to colour the mice. 
 Stamped some stars then coloured and highlighted areas with pens.
 Trimmed the card and inked the edges. 
 More detail on the mice, white penwork and gold.
All finished.….hope he likes it!
 Thanks for looking. Suz

Sunday, 9 February 2020

Rice Bike canvas for Andy Skinner's Creative Team and Creative Expressions

Here's my first project using Andy's February 2020 releases! So much fun.
First up was the rice paper. I watered down a little of the Quick Grab Glue and it stuck down beautifully with no crinkles (glue applied to canvas and on the back of the paper) stick down and brush from the centre out to release air bubbles.  
 Then my first time using the new structure paste - gorgeous stuff, creamy, easy to use and dries quicker than other pastes I've tried.


I used the new chalk paints - first a wash of the Chestnut.
 Then a gentle dry brush with warm white, several times, layering up to bring out all that fab texure.
 I stamped the Rice Bike stamp onto calico and also onto a vintage book page. Layered up some organza and old bandage from my fabric stash and had a play around with layout.
I tore out and stuck down the stamped vintage book page onto the calico. Added torn paper and a strip of tumble dryer sheet (removed this in the end). I glued down thin strips of paper above and below the bike image. But they seemed a little bare, so they were stamped with the 'Cracked-Up' stamp using the chestnut chalk paint (wash paints off stamps straight away). 


Mini metal cogs, jewellery wire, left over bits of torn fabric and an old clip-on earring to embellish, needed something at the top so I used an old bulldog clip too for a bit of fun!
You can check out the other fab projects on Andy's blog HERE.
Thanks so much for looking.
Suz xxx