My little crafting world....


Hi all
I'm a complete craft addict! I have a small business called Surrey Crafts teaching craft workshops from my studio in Esher, Surrey and at venues around the country. I teach mixed media, decorative painting, card making and papercrafts, jewellery making and creative embroidery classes. If you'd like to find out more just leave a comment, or take a look at my other social media pages:
Facebook: https://www.facebook.com/surrey.crafts
Instagram: https://www.instagram.com/surreycrafts/
Pinterest: https://www.pinterest.co.uk/surreycrafts/
Crafty hugs & stuff
Suz

xx

Showing posts with label Andy Skinner. Show all posts

Saturday, 2 May 2020

Repurposed canvas and bandage dressing

Hi all
I made this fun canvas to join in with the Creative Expressions Mixed Media Challenge day 1 with the theme of 'Bright'.
I took an old canvas I no longer liked and covered it with vintage book pages then a coat of mixed media paint. 
Then added Intense Pigment Stains in Bluebell, Emerald and Citrus Lime, layering up until I liked the colours.
I then used the same products to colour an old field dressing/ bandage and that had been in my stash for years (not useable as no longer sterile due to damaged packaging) and a piece of hessian fabric. I spritzed water to help the bandage and hessian soak up the colours.

Taking the Smashed Glass Andy Skinner stamp, I used my stamp platform and Versafine Jet Black ink to stamp onto a piece of calico. frayed the edges and stuck it down onto the hessian. I had to use red liner tape as wet glue would have seeped through, activated the colours underneath and stained the stamped calico.
 Glass gems and fabric roses gave a pop of red to the canvas. But it needed something else. So I wrapped wire around my spritzer bottle to form loops, then stuck these underneath the focal point of the layered bandage and fabric.
 You can see some of the text through the colours here and below.


 Love how colourful this is.

Thanks for looking.
Suz
x

Friday, 3 April 2020

HOPE - for the Craft Stamper April Challenge

Hi all

Hope is something many of us need right now. It is a very difficult time and our new world and way of living is affecting so many elements of our lives. So I just want to send a little hope out to all of you. Talking of hope - there are GORGEOUS stamps and a stencil to be won this month, seriously, they are beautiful, and I HOPE you will take part! Take a look HERE.
 I used two vintage book pages, Shakespeare don't you know, (sold by the library years ago as falling apart) glued them together as they were very thin. Added a layer or watery gesso so the text would shows though.
 A little more gesso, then some light blue DecoArt paint added with a very watery brush.
 Stamped Andy Skinners 'Memories of India' stamp, firstly in a green, Shabby Shutters colour, then I stamped it some more with a clear Versamark pad and used a very pale pink embossing powder by Creative Expressions to build interest in the background.
 Then I used all the foliage stamps from Jane Gill's Woodware stamp set 'Hare in the Middle' (JGS699), inked with Olive Memento ink and then with Versamark and heat embossed with clear powder. I did this on my stamp platform as I repeatedly stamped each of the images to build the layers.
 You can just make out the pink embossing in the background in the photo below....
 My plan was to use little white flowers to fill all the gaps I'd left in the foliage. So I used an old die set by Susan's Garden called Flower Yarrow as it cuts loads at once - but you could use any small flower die or punch. I added tiny white pearls in the middles and glued down with Cosmic shimmer. I also found this pretty butterfly which I had in my stash - it was in a set from either the Range or Poundland. To make the antennae I just looked around for a slither of card I'd cut when making another project!
 The Hope stamp is another Andy Skinner stamp. I coloured it with the ink used for the foliage.  Once dry I added another little flower to the edge to tie in with the rest of the card.
And that's it for now.
Thanks so much for looking. Please do keep going.... and have hope.
Suz
xxx

See below for links to the stamps I've used:
Memories of India
Hare in the Middle
Hope

Thursday, 5 March 2020

Journal Page for the Craft Stamper March Blog Challenge

Hi all
Todays project for the CS blog Challenge is an A4 journal page.
There are 4 pots of Tim Holtz gorgeous Embossing Glaze to be won this month, so why not pop over to the Craft Stamper blog and take a look HERE
Here are a few pics of the process..... 
 To begin, I painted an area with a skintone, then stamped over it. 
I stamped again onto white paper, cut out the eyes and stuck them on top.
 After placing a mask on top of the eye stamp, I repeatedly brayered several fluid acrylics until I had the blend of colours I liked. Then I stamped the smashed glass with Versamark ink and embossed.
 A bit of stencilling.....
Some mark making (paint and the side of a piece of card) 
Doodling with white paint pen, and a black outline smoshed around the eyes. 
I held the page upside down, placed crayons against the page and heated them 
until they melted and ran down the page. 
 Stamped out a sentiment a couple of times (which was the inspiration for the melted crayons), chopped it up and used the pink and green crayons to colour the edges.
 Stuck down the words and used a black Posca Paint Pen to edges them, then with a watery
 brush I softened the black paint. Drew around the stencilled patters with the white pen.
Some stick on ribbon down the sides (bought this from Poundland months ago) and used a 
Stabilo All pencil along both the sides of the crayon section.
 A bit more fiddling with doodles, a couple of butterflies to the sides of the eyes
 (to soften them) and that was that!
Thanks for looking. Not sure how much I like this - but I loved the process. 
Lots of stamping and melting crayons was fun!
Suz
xxx

Sunday, 9 February 2020

Rice Bike canvas for Andy Skinner's Creative Team and Creative Expressions

Here's my first project using Andy's February 2020 releases! So much fun.
First up was the rice paper. I watered down a little of the Quick Grab Glue and it stuck down beautifully with no crinkles (glue applied to canvas and on the back of the paper) stick down and brush from the centre out to release air bubbles.  
 Then my first time using the new structure paste - gorgeous stuff, creamy, easy to use and dries quicker than other pastes I've tried.


I used the new chalk paints - first a wash of the Chestnut.
 Then a gentle dry brush with warm white, several times, layering up to bring out all that fab texure.
 I stamped the Rice Bike stamp onto calico and also onto a vintage book page. Layered up some organza and old bandage from my fabric stash and had a play around with layout.
I tore out and stuck down the stamped vintage book page onto the calico. Added torn paper and a strip of tumble dryer sheet (removed this in the end). I glued down thin strips of paper above and below the bike image. But they seemed a little bare, so they were stamped with the 'Cracked-Up' stamp using the chestnut chalk paint (wash paints off stamps straight away). 


Mini metal cogs, jewellery wire, left over bits of torn fabric and an old clip-on earring to embellish, needed something at the top so I used an old bulldog clip too for a bit of fun!
You can check out the other fab projects on Andy's blog HERE.
Thanks so much for looking.
Suz xxx

Wednesday, 30 October 2019

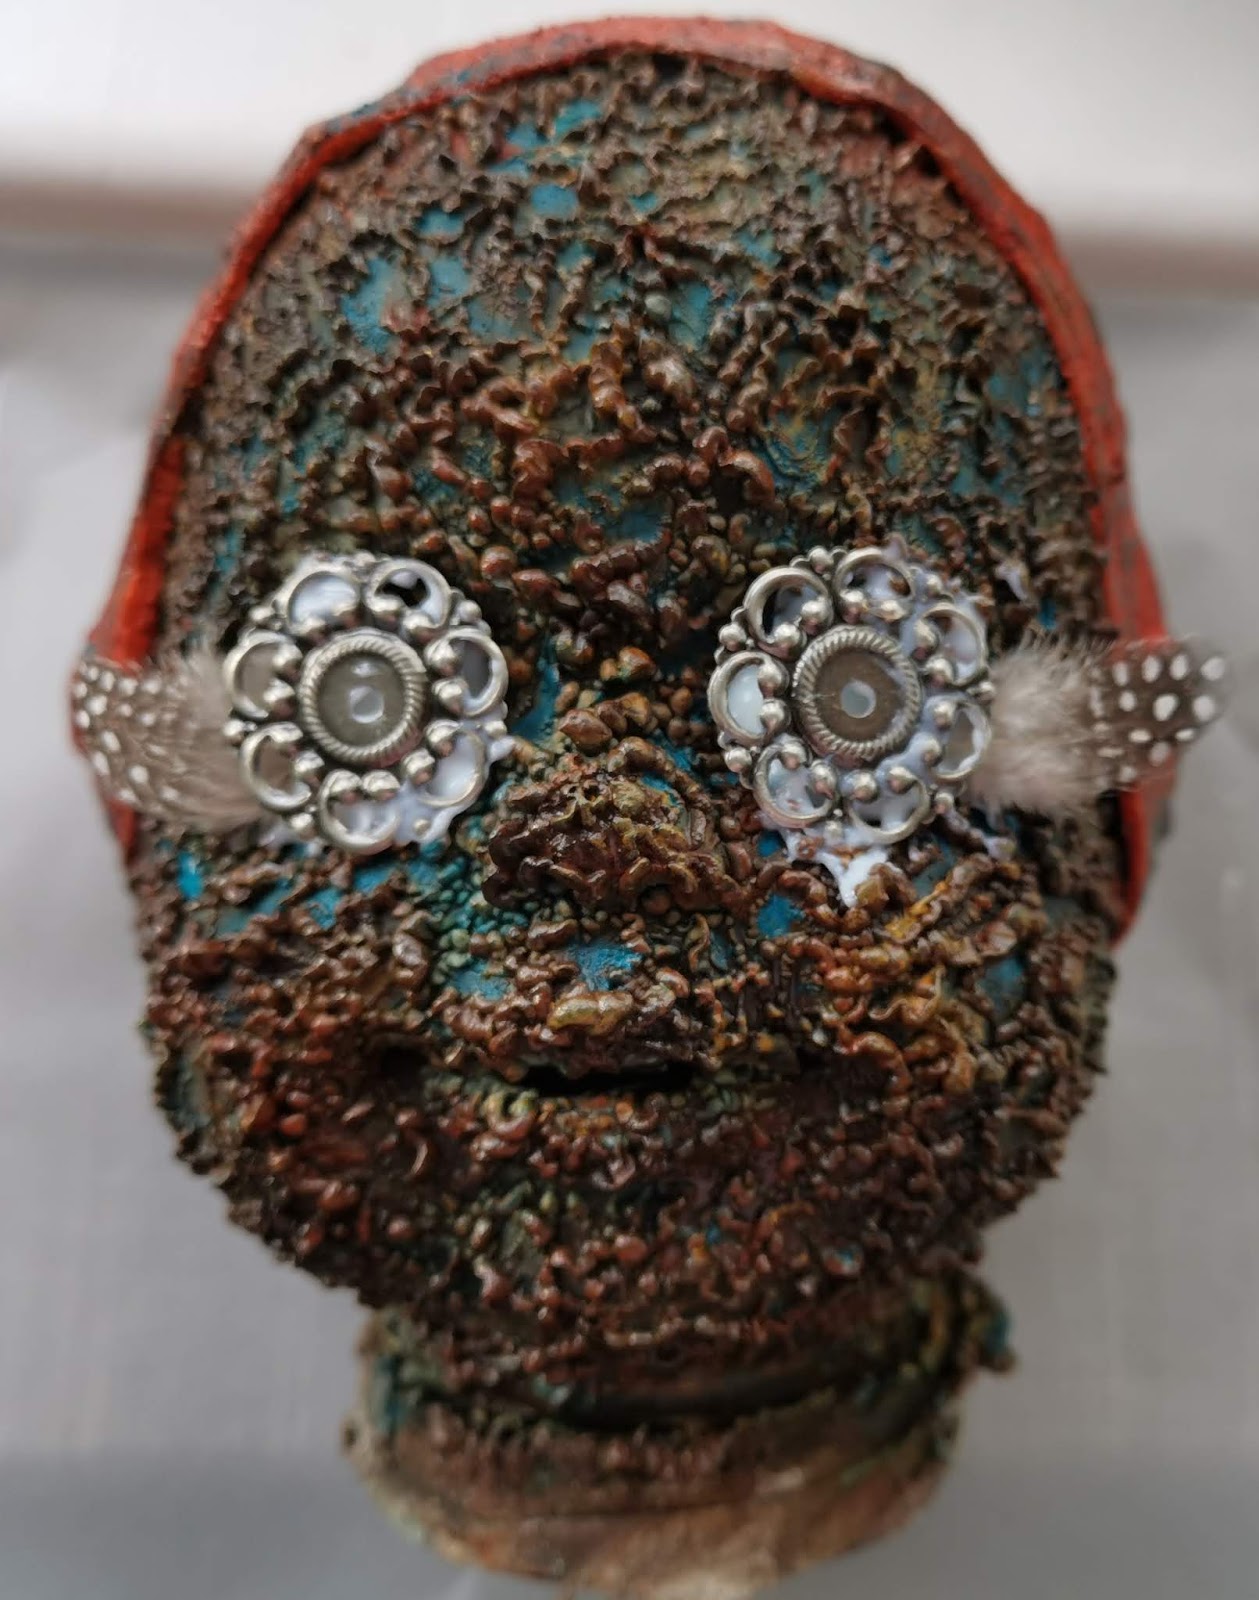
Industrial Altered Dolls Head for my Andy Skinner DT project.

Hi all
Yep, a totally weird one from me today for my Andy Skinner DT project this month.
I've had this tatty, bald dolls head for years. 
Time to use it or get rid of  it. And what better products than Andy's Lava Paste and his new 
Creative Expressions paints to give it a revamp.  Here's how it turned out.
Here's how I made it....
I took the dolls head, painted it with black chalky finish, then a coat of rust all over, even the eyes. Which then looked awful! Then layer a thin amount of the Lava Paste with a palette knife, like icing a cake. But for even more texture, then dab the palette knife up and down all over, the paste holds itself into little peaks.
 If you heat activate the lava paste you'll end up with something like this.
 Layers, and layers, and layers or paints in the rust, Quin Gold, Yellow, and Cobalt Teal.
 More layers - dabbed on with a sponge.
 I used plaster wrap all around where the hair would be to cover up the stubby bits and create a hat or skull cap type head cover. Then painted the hat with the quin gold, bit of rust and cobalt teal.
 More teal dabbed in to face area...then more and more layers of paint until I was happy with it.

Needed to cover the eyes as they bothered me. So feathers and metal 
embellishments from my stash transformed it from horror to industrial!
 A bag of bits from Wilko, think this bag cost about £2.50
Out comes the wire. I used it to make a metal headband. Then hooked it in and out of the holes on the base of a very old cake tin, to make the wire cage. A few more feathers on top, along with another metal embellishment to hide the stalks of the feathers and it's done.
Thanks for looking.
Suz
For a list of all the products, check out my post on Andy Skinner's blog.