My little crafting world....


Hi all
I'm a complete craft addict! I have a small business called Surrey Crafts teaching craft workshops from my studio in Esher, Surrey and at venues around the country. I teach mixed media, decorative painting, card making and papercrafts, jewellery making and creative embroidery classes. If you'd like to find out more just leave a comment, or take a look at my other social media pages:
Facebook: https://www.facebook.com/surrey.crafts
Instagram: https://www.instagram.com/surreycrafts/
Pinterest: https://www.pinterest.co.uk/surreycrafts/
Crafty hugs & stuff
Suz

xx

Sunday 18 March 2018

Tech Trauma Abstract Art for Andy Skinner DT

I really enjoyed making this, and love the feature stamp from Andy's Tech Trauma stamp set.


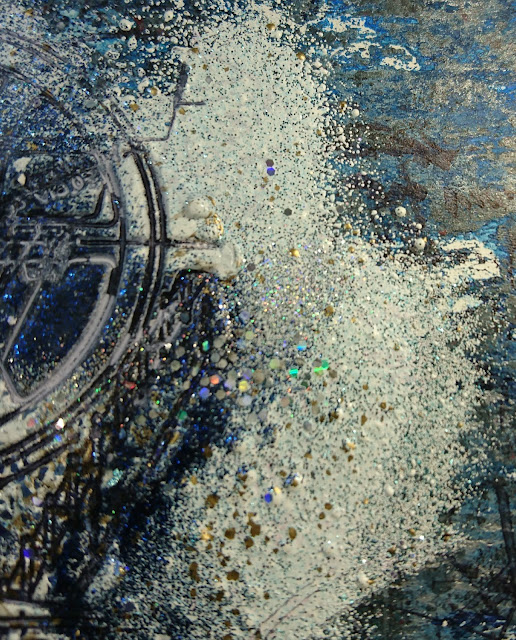
Here are a few close ups to show the bling a bit better, and a step by step of how I made this piece.
 Love the texture in it!

 It sparkles!
I built up lots of layers with background stamps. Different elements show up in different lights and at different angles. Here is the process.
 Brayer on a generous layer of DecoArt Media Gesso. This give a lovely texture for the layers of media fluid acrylics that will go on top. While still wet, add drops of Primary Cyan and brayer again.
 Repeat with Prussian Blue Hue.
 Then Metallic Silver
 Titanium White
 Build more depth by repeating some colours.
 Add some Interference Blue for a bit of tonal opalescent colour change (depending on light reflection) shimmer.

 
Continue layering more colours until you are happy with the background.


 I decided to do a bit of background stamping with some of the Tech Trauma stamps.
 Ink up and stamp away!
Once all completely dry, use an anti static pad then a clear embossing ink where you would like your feature embossing. Before I added the clear ink I cut the card to be square rather than rectangle.

 Sprinkle Shabby Blue Frantage powder onto the clear ink and heat emboss.
 Then repeat with Royal Blue...
For the final layer, prepare your feature stamp by inking it up with black Archival ink, repeat the embossing with the Halo and stamp firmly into it with the stamp while it is still molten. I hadn't let the card dry completely before the embossing so it did buckle a bit, but was once I had let it rest, and had flattened it out for a few hours with heavy books.
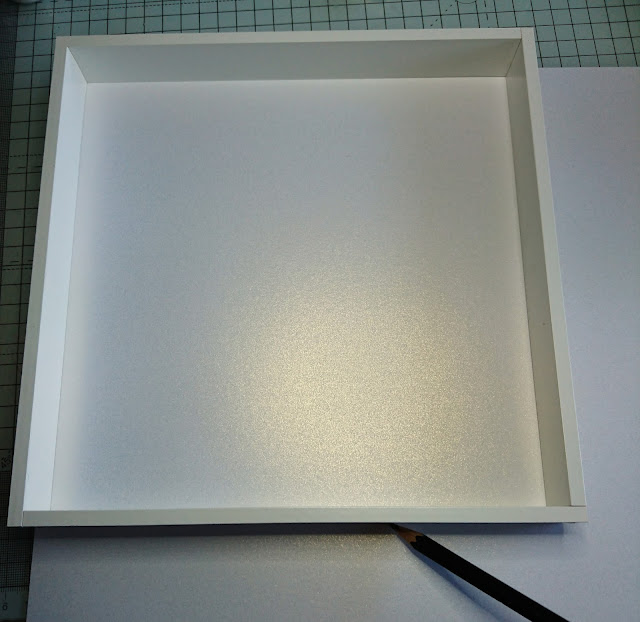
The frame I bought for this project had a mount already in it, but the aperture was way too small so I made another. I marked the size of the whole frame onto some 300gsm pearlised card.

The artwork I wanted to frame was 19 x 19 cms
So taking away the size of the artwork from the size of the frame, devide by 2 to give you the size of the border, just over 2cms

Check your measurements BEFORE cutting out the aperture in the middle!
Once you've checked cut out the middle.
 Making a hole at the intersection of each corner really helps with getting a neat cut from edge to edge.
 I used a steel edged ruler and a craft knife wit a fresh glade.
 Lined the artwork up on the back of the mount and taped it down with masking tape
 Now it's ready to put in the frame, peel the protective backing off the Perspex of the frame. I wipe the mat I'm working with and the frame with an anti static pad, otherwise static attracts bits of dust and dirt to it!


Friday 9 March 2018

Fabric Covered Dragonfly Notebook for the Craft Stamper Blog Challenge


Here is the finished fabric covered notebook I made for my entry to the March Craft Stamper Take It Make It Blog Challenge. And below is a quick explanation of the process. 
I've had the gorgeous 'Creepers and Crawlers' Illusionary Artist Stamp Set
by France Papillion since they were launched a few weeks ago, and finally had a chance to play with the dragonfly stamp from that set! 
I made a pocket sized, fabric covered notebook.  Frayed a piece of bandage (might also be called open weave cotton or something!) and a piece of hessian (burlap) and glued them onto the front using DecoArt Decoupage Glue. Once dry I added some pieces of torn paper (which was really a Christmas cracker hat!!!) again with the glue and then some crackle paste through a stencil.
While the paste was still wet, I added a little Stampendous glitter to it
just by lightly pushing it gently into the paste.
I set that aside to dry for a few hours.
 I knew EXACTLY what I wanted to do with the dragonfly stamp from this set. I pulled out my old Angelina Fibres, and some parchment paper and inked up the stamp with black archival ink.
The stamp needs to be good quality grey rubber like this one for the next step which involves an iron.  I teased out and carefully placed some of the fibres over the stamp making sure the whole image was covered with them. 
Next I laid baking parchment in top of the fibres, and ironed over the top of the parchment with my craft iron until the black of the archival ink showed through the fibres. See pic above. I cut out the dragonfly image.
 I added some gold Media Fluid Acrylic paint to the crackle paste stars and the middle of the dragonfly. Then I added some diluted Phthalo Blue media fluid acrylic with a fine brush around the edges and wings of the dragonfly and also to the areas of the crackle paste. This really highlights the texture of the dried crackle and also makes the dragon fly appear more dimensional especially around the wings. Once everything was dry, I glued on the dragonfly . Final touch was to ink the edges of the book front with an archival ink pad. I used 'Forget me not'.
I hope you like it and have a play along with the challenge. There are some lovely stamps to be won!
Thanks for looking.
Suz
x
Products used:
France Papillion  Illusionary Artist Creepers and Crawlers Set
DecoArt Media Fluid Acrylics in Phthalo Blue and Gold, plus Crackle Paste and Decoupage Glue
Archival ink pad in Forget me Not
Fabrics and a paper hat
Angelina Fibres (or my packaging called these DicroFibres)
 

Tuesday 6 March 2018

Upcycled Dolls House Furniture

A super quick post today. I found a little dolls house in a charity shop a few weeks ago and had to buy it just because I had exactly the same thing as a child, for my Sindy dolls! Here is a pic of how it turned out - sorry about the lighting, it doesn't capture the metallic sparkle at all sadly!!!
The dark patches are actually shiny and golden!
This is how it looked after a good clean and before I painted it; a bit sad, the plastic was yellowed and patchy which you can't really see and the definition on the doors and drawer fronts was faded. And look at that original box! It had most of the items in the pic except some of the cutlery and the candelabras.
I mixed some DecoArt Chalky Finish Paint in pale pink (Pink Chiffon) and white (Everlasting) to make a really pale pink. Having given all the pieces a really good wash with hot soapy water, I gave it all a coat of the mixed paint. You have to be really careful with any furniture, but especially with miniature pieces like this, not to leave paint along edges where doors etc fit. Just a thin layer of paint where things slide in can stop doors closing and drawers closing. So once it's all painted go around where things meet with a bit of sand paper.
I used a sponge to paint most of it, the 4 sides and the legs, this makes it a lot easier to minimise paint runs and give a consistent coverage. And along the top where I did want it smooth, I used a wide brush.

Once completely dry, I used metallic lustres in Iced Espresso and Champagne to highlight the doors and drawer edges and handles and raised decorative areas. I also added a few streaks along the smooth top of the furniture for a little bling!

I was very lucky that I knew of someone who wanted the upcycled piece, who gave me a little more than I paid for it (which is all I asked) as a donation to the Princess Alice Hospice as I am taking part in a Charity Fundraising Abseil on 24th March down Spinnaker Tower!

Thanks for looking!
Suz