My little crafting world....


Hi all
I'm a complete craft addict! I have a small business called Surrey Crafts teaching craft workshops from my studio in Esher, Surrey and at venues around the country. I teach mixed media, decorative painting, card making and papercrafts, jewellery making and creative embroidery classes. If you'd like to find out more just leave a comment, or take a look at my other social media pages:
Facebook: https://www.facebook.com/surrey.crafts
Instagram: https://www.instagram.com/surreycrafts/
Pinterest: https://www.pinterest.co.uk/surreycrafts/
Crafty hugs & stuff
Suz

xx

Friday 13 December 2019

Christmas Joy! For the December Craft Stamper Blog Challenge

Hi all
Here's a little Christmas make for my last Craft Stamper challenge post of 2019. And I've called it Christmas Joy. There's a gorgeous set of Jane Davenport watercolours to be won by one lucky winner! To have a look at the challenge click HERE.
Having decided I would do a Christmas project, I grabbed my box of Christmas stash and this cute little deer practically jumped out at me! Then I found a greyboard base to pop him onto.
I pounced some gesso on the deer for texture.
layered up the base with book pages.
Added layers of paint.
Then a layer of lava paste...
I stamped into the lava paste to the bottom of the base layer to give even more texture.
I started to heat the lava paste...had to take a pic to show the change, love how it looks!
You can see how the stamping looks after it is heat activated.
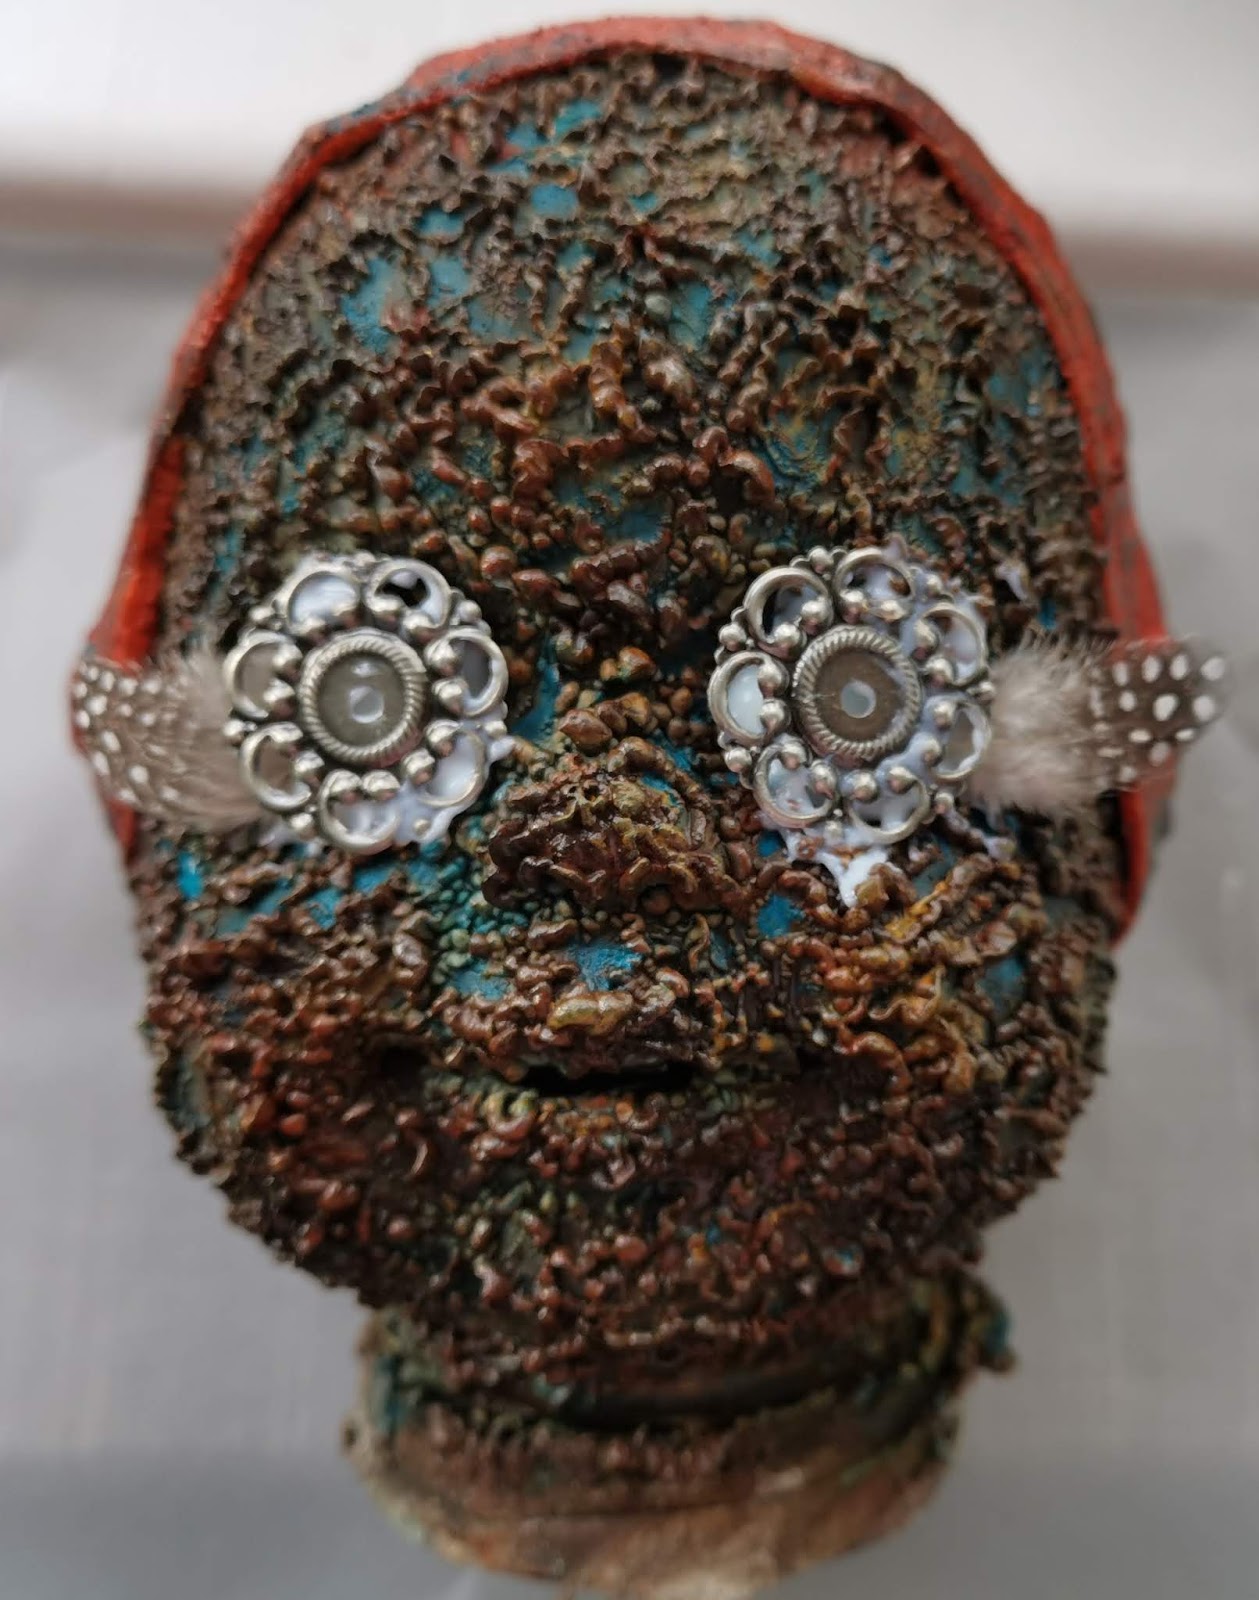
Back to the deer...first layer of colour.
another colour....
Time for so embossing, using Stampendous gold and another of the snowflake stamps.
Then the antlers, with Wow glitter powder.
More paint on the base, I covered the lava paste. Then used Andy Skinners Enigma stamp and his Crystal Glaze mixed media embossing powder across the top - to look like icicles or snow.
Dry brushing with white paint really brings out all that texture - even over the embossing!
After gluing down the deer with 3D gel, I used letter stickers, 
a gift from my American friend Andrea, to add the word 'Christmas' at the bottom.
 The letters are sticky on the top and bottom. I stuck the letters to a craft mat before peeling off the top to expose the sticky, and covered them with glitter.
To get words central and evenly spaced, start with the middle letter, then add those at either end.
A die cut bauble, and some gold stars, and a bit of twine and a bell for his neck.
Lastly a bit of wire for hanging this cheerful Christmas decoration. 


Friday 8 November 2019

Find Your Peaceful Place - for the Craft Stamper Challenge Blog

Hi all
Me again! Today I am sharing my monthly project for the Craft Stamper Challenge Blog. Some fab PaperArtsy stamps to be won, have a look here. My project is called Find Your Peaceful Place, and is inspired by my beautiful friend Tracy Easson who also designed this gorgeous stamp.
The project is on a fabric page that I plan to put into a fabric book I am working on, which is an ongoing project started at a fab class I did with Tracy called the 'Little Book Of Wishes'.
I stamped the design onto coffee died calico using a Versafine ink pad on a stamping platform. I kept the calico in place on the platform while I painted it using DecoArt Media fluid acrylics, in the colours you see in the photo - plus metallic silver which I forgot to put in.
 Once dried, I restamped the image so it was nice and crisp again. 
I added stamped hearts from another of Tracy's stamp sets (Little Angel) and doodled bunches of flowers. I love how it's turned out! 
Just love playing with fabric and paints!Tracy has some amazing projects with detailed tutorials in this months Craft Stamper magazine. You can get the latest issue Here!
Thanks for looking.
Suz

Thursday 7 November 2019

HOPE - For Andy Skinner's new Creative Expressions launch

Hi all
Another fantastic set of crafty goodies has just been released by Andy Skinner in partnership with Creative Expressions. I've been lucky enough to have a play. Here's what I did with them...
A plain old piece of cardboard. A coat gorgeous Strata Paste along the bottom, a layer of paint and smudges of resist paste on top...
Mixing lots of the paints, I used Andy's heart stamp to make the foliage- there is a tiny bit of it that looks like a tree, on top I used the tip of a paint brush to create leaves and branches using various mixtures of the paint.
Dry brushing with the Rust shows all the texture of the Strata Paste. Text and elephant stamped and coloured, and all the edges of the board inked with VersaMark and the Super Nova embossing powder melted all around
I've loved using Andy's new products. I hope you do too. Thanks for looking. Suz xxx


Wednesday 30 October 2019

Industrial Altered Dolls Head for my Andy Skinner DT project.

Hi all
Yep, a totally weird one from me today for my Andy Skinner DT project this month.
I've had this tatty, bald dolls head for years. 
Time to use it or get rid of  it. And what better products than Andy's Lava Paste and his new 
Creative Expressions paints to give it a revamp.  Here's how it turned out.
Here's how I made it....
I took the dolls head, painted it with black chalky finish, then a coat of rust all over, even the eyes. Which then looked awful! Then layer a thin amount of the Lava Paste with a palette knife, like icing a cake. But for even more texture, then dab the palette knife up and down all over, the paste holds itself into little peaks.
 If you heat activate the lava paste you'll end up with something like this.
 Layers, and layers, and layers or paints in the rust, Quin Gold, Yellow, and Cobalt Teal.
 More layers - dabbed on with a sponge.
 I used plaster wrap all around where the hair would be to cover up the stubby bits and create a hat or skull cap type head cover. Then painted the hat with the quin gold, bit of rust and cobalt teal.
 More teal dabbed in to face area...then more and more layers of paint until I was happy with it.

Needed to cover the eyes as they bothered me. So feathers and metal 
embellishments from my stash transformed it from horror to industrial!
 A bag of bits from Wilko, think this bag cost about £2.50
Out comes the wire. I used it to make a metal headband. Then hooked it in and out of the holes on the base of a very old cake tin, to make the wire cage. A few more feathers on top, along with another metal embellishment to hide the stalks of the feathers and it's done.
Thanks for looking.
Suz
For a list of all the products, check out my post on Andy Skinner's blog.

Friday 11 October 2019

Happy Halloween Skull Frame

Hi there.
My project for the October Craft Stamper Challenge Blog DT this month is this fun Halloween framed skull. There are some gorgeous Prima Moulds to be win, take a look here
I made stamped and coloured this fun skull at the same time as another one I have details of in my previous blog. For this one I used Andy Skinner Super Nova Media embossing powders to emboss his Skull stamp, coloured it with Distress Oxides and enhanced with markers and added gems to the eyes and chin.

 I decided which of Andy's new transfers to use on the frame. You can hold the see through sheet to offer up the designs against your base to help with placement.
 Then to ink up the mount that is inside the frame.
 I made it quite bright!
 Added the transfers - I LOVE them! And a bit of pen doodling to fill the empty space
 Then onto the gold frame...
 A coat of DecoArt chalky finish paint in Relic, which is a very dark, beautiful grey. Then I rubbed it back a bit to let some of the gold shine through. I stamped Andy's Grunge Wallpaper stamp and embossed with the Super Nova onto black card for the background.
Decided the skull was going on top of the glass for a bit of a change!
Used Metallic Lustre in Iced Espresso on the inside of the mount as it was a little discoloured, plus I just love the colour! 
 I wanted something pinging off of the frame so chose Andy's Gypsie Queen stamp, again stamped onto white card, but this time I used Wow white embossingpowder - and made sure I wiped the card with an anti static pad before stamping for a crisp image.
 I added some twisted rusty wire to suspend the moth.
 I found some rainbow coloured threads I've had for years, they colours went really well so I chopped some off and stuck a bunch behind the skull.
 A bit of double sided tape holds them up at the top, the rest are stuck underneath the skull.
 The 'Fig 746' image is part of the moth stamp, by putting it in the opposite corner to the moth it balances the project.
 I was really enjoying myself by this stage. 😍
Love how the flying moth looked.....gave her a selfie. 
And here is the finished piece. I with you could see how