My little crafting world....


Hi all
I'm a complete craft addict! I have a small business called Surrey Crafts teaching craft workshops from my studio in Esher, Surrey and at venues around the country. I teach mixed media, decorative painting, card making and papercrafts, jewellery making and creative embroidery classes. If you'd like to find out more just leave a comment, or take a look at my other social media pages:
Facebook: https://www.facebook.com/surrey.crafts
Instagram: https://www.instagram.com/surreycrafts/
Pinterest: https://www.pinterest.co.uk/surreycrafts/
Crafty hugs & stuff
Suz

xx

Monday 30 April 2018

Age Old Arguments


This was one of those projects that is just a big of fun, and may never be finished, I threw the kitchen sink at it!


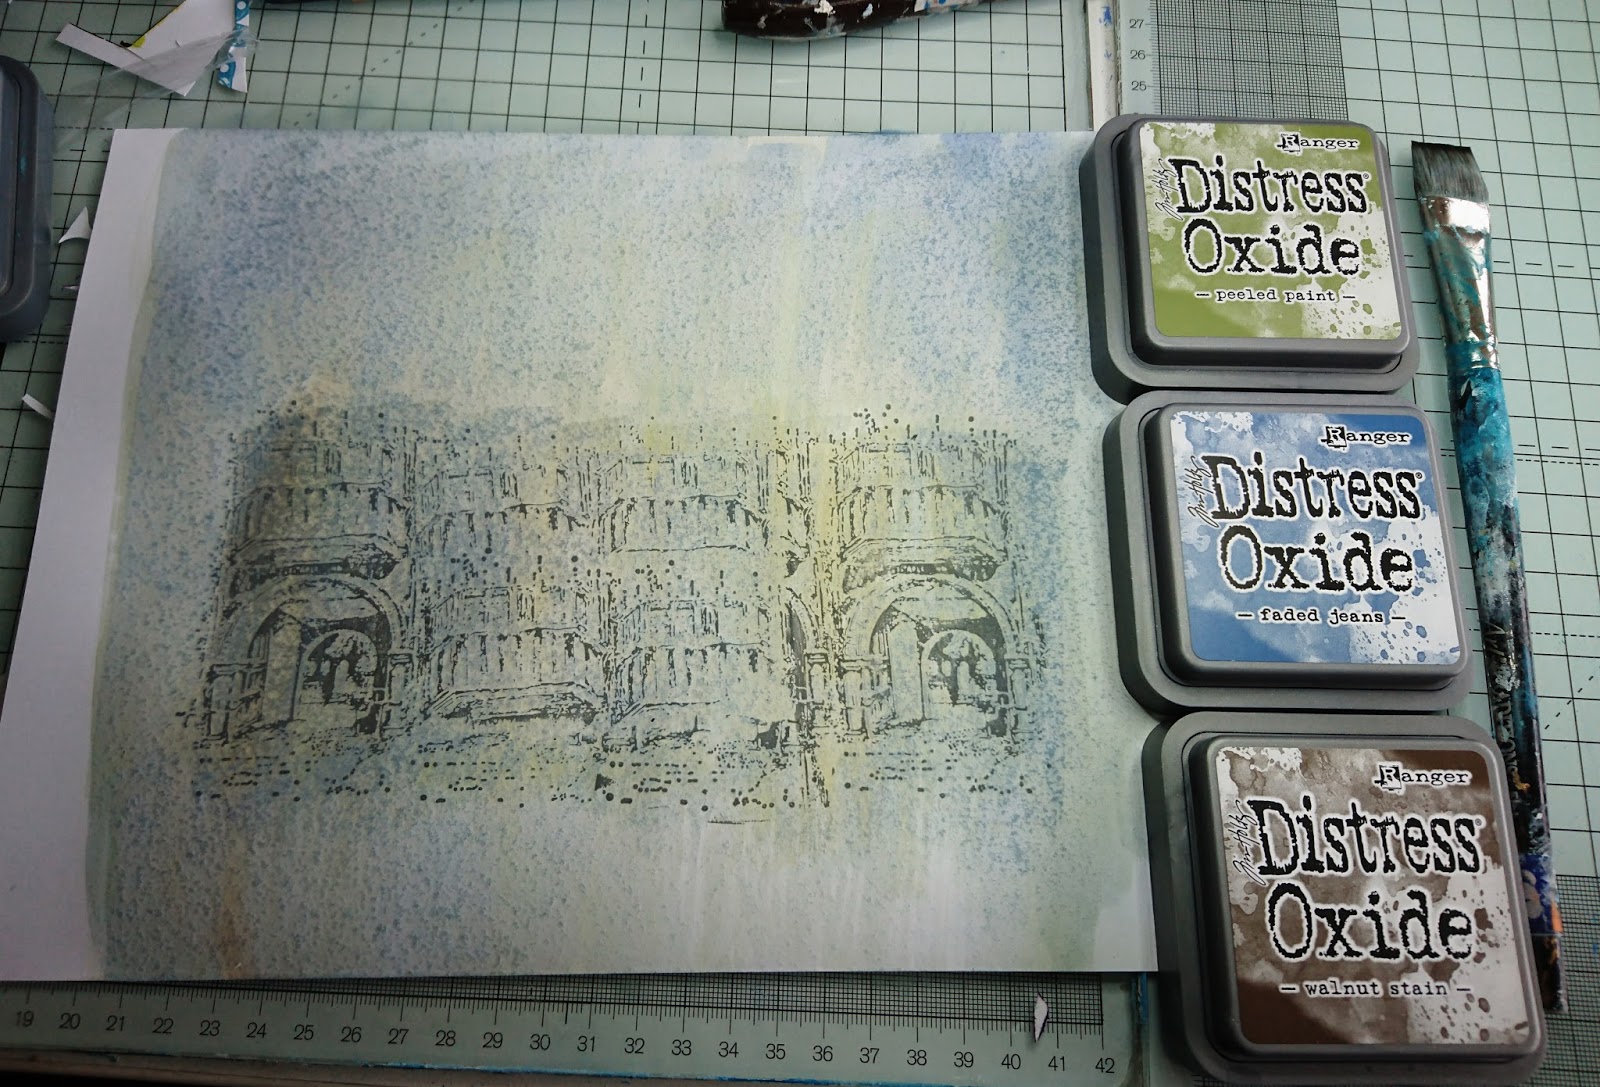
I repeat stamped the arch from Andy's 'Gothic Grunge' set, masking off to create more columns.
Coloured the card with distress inks to start with....
Paynes Grey and Quin Gold added, then torn and inked around the edges with black archival ink.
For the base I just used a rectangular canvas I had previously painted with Emporers Gold and then bubbled (a workshop technique I use). I stamped and embossed images from lots of Andy's stamp sets all around the edge of the canvas. Skeletons and gargoyle stamped and embossed with white embossing powder onto velum.  Using vellum I was able to stamp the image twice and flip one over to create a reverse image and have them looking at each other! I also chopped of one arm at the elbow and changed the angle to give a different feel to it. Then glued to them card using Matt Medium.
Grey paints added to the stamped gravestones, cloth added, spider embossed with black powder and a bit of gold added to his back.
Clear modelling paste through the stencil which dries clear
but gives lovely texture for drippage and dry brushing.
Words typed, printed, cut out and coloured. Hills built up under the gravestones so they were a bit more 'grounded'. Layers of paints in golds, greys, cobolt blue, yellow iron oxide, etc. Shade added using carbon black around images and the focal card section; to bring forward the crosses and cast them each a shadow. Rusty wire and a piece of card for the collar and lead, gems on the gravestones. Metal embellies, a circle of rusty wire and jewellery chain coloured with quin gold, red iron oxide and trans yellow iron oxide. Black archival ink added around the outside.
In the final pic I've dry brushed white over the stamped areas around the outside to bring them forward from the background, and added chain so the embellies had an anchor point and weren't just floating - although I kinda liked that!

Thanks for looking! Below are product lists and some links to shops.
Happy arting! Suz xxx

http://www.andyskinnercrafts.com/store/c1/Featured_Products.html

http://www.andyskinnercrafts.com/store/c10/Illusionary_Artists_Stamps.html


Products used:

Andy Skinner Stamps: Spooks (Gargoyle); Gothic Grunge (archways) ; Birds and Bones; Fossils

DecoArt Media Fluid Acrylics: Grey Value 6; Titanium White; Paynes Grey; Cobalt Teal Hue; Transparent Yellow Iron Oxide; Quinacrydone Gold; Transparent Red Iron Oxide; Carbon Black; Titan Buff; Matte Medium; Clear Modeling Paste, Dazzling Metallics Emperors Gold

Other products used:
white velum, cardstock, repurposed canvas, detailed white embossing powder, detailed black embossing powder, metal charms and embellies, greyboard spider from Tando Creative, cheesecloth (bit of old bandage), gems. jewellery chain, black archival ink

Friday 13 April 2018

"Be Sensational Craft Stamper" DT Blog Challenge project

Hi there! Here is my DT project or the Craft Stamper April Blog Challenge.  Some gorgeous stamps to be won, so why not have a look and see if you fancy joining in! Click HERE!
The starting point for this was a gorgeous stamp by Dyan Reaveley from her 'Black Sheep' stamp set, which I've had for ages and been dying to use! I was in a seascape kinda mood due to prepping for a class I'm teaching this weekend - so to me she looked like a Mermaid!
I stamped and embossed her twice using Versamark ink and black Wow embossing powders.
Coloured her in using Kurateke Zig Clean Colour brush pens which I bought from Hobby Art.
I coloured and cut out the second skirt to create the shape of a Mermaids tail.
I chopped off her head, coloured and cut out the eyes from the second image and glued them on.          The next bit took some working out. I wanted to extend her hair....so either I had to cut off the ends of the hair and extend them, or just make my own. That's what I did. I cut the face from the head image I'd already cut out and drew around it to create a guideline for the hair. Took a Wow embossing pen to draw swags of thick hair and embossed with detailed black Wow embossing powder.

Using the Kuretake pens I coloured in the hair, and once coloured I used a fine black marker to start to doodle. Once finished I used a white gel pen to draw lines down the centre of the swags of hair to make them look shiny.
Then I glued the face onto the hair, all ready to glue to the background I was about to make.
My DecoArt Media Fluid Acrylics came out again for the background cards, as they are soooo quick to use with a brush, click HERE to find them. I diluted just a couple of drops of each of the three colours, starting with the Primary Cyan, Then the Pthalo Blue, then the Cobalt Teal Hue. I repeated these three to add depth then used some diluted Titanium white to make splatters (or in my mind watery bubbles in the sea).  I used these three colours again on a second piece of card, and also added a small amount of Pthalo Green Blue. 

Once the backgrounds were dry I started to layer up, my girl first of course. Once all glued down, I printed out and glued on a few words and thought that was it.....but when I came back to it I wanted to add a bit more detail......
So to REALLY finish off, I went around the whole image with a black Pitt Pen brush marker. Then went around it - and the inner card rectangle - with a white gel pen (Signo Uniball 153) and then took a piece of black charcoal stick (always use these) and added a deep black shading under the image to the right hand side - to make the light seem to come from the left.

I like her - she's a bit quirky and weird with attitude and a little twist on a fab stamp!
Thanks for looking!
Suz
xxx