My little crafting world....


Hi all
I'm a complete craft addict! I have a small business called Surrey Crafts teaching craft workshops from my studio in Esher, Surrey and at venues around the country. I teach mixed media, decorative painting, card making and papercrafts, jewellery making and creative embroidery classes. If you'd like to find out more just leave a comment, or take a look at my other social media pages:
Facebook: https://www.facebook.com/surrey.crafts
Instagram: https://www.instagram.com/surreycrafts/
Pinterest: https://www.pinterest.co.uk/surreycrafts/
Crafty hugs & stuff
Suz

xx

Wednesday, 30 October 2019

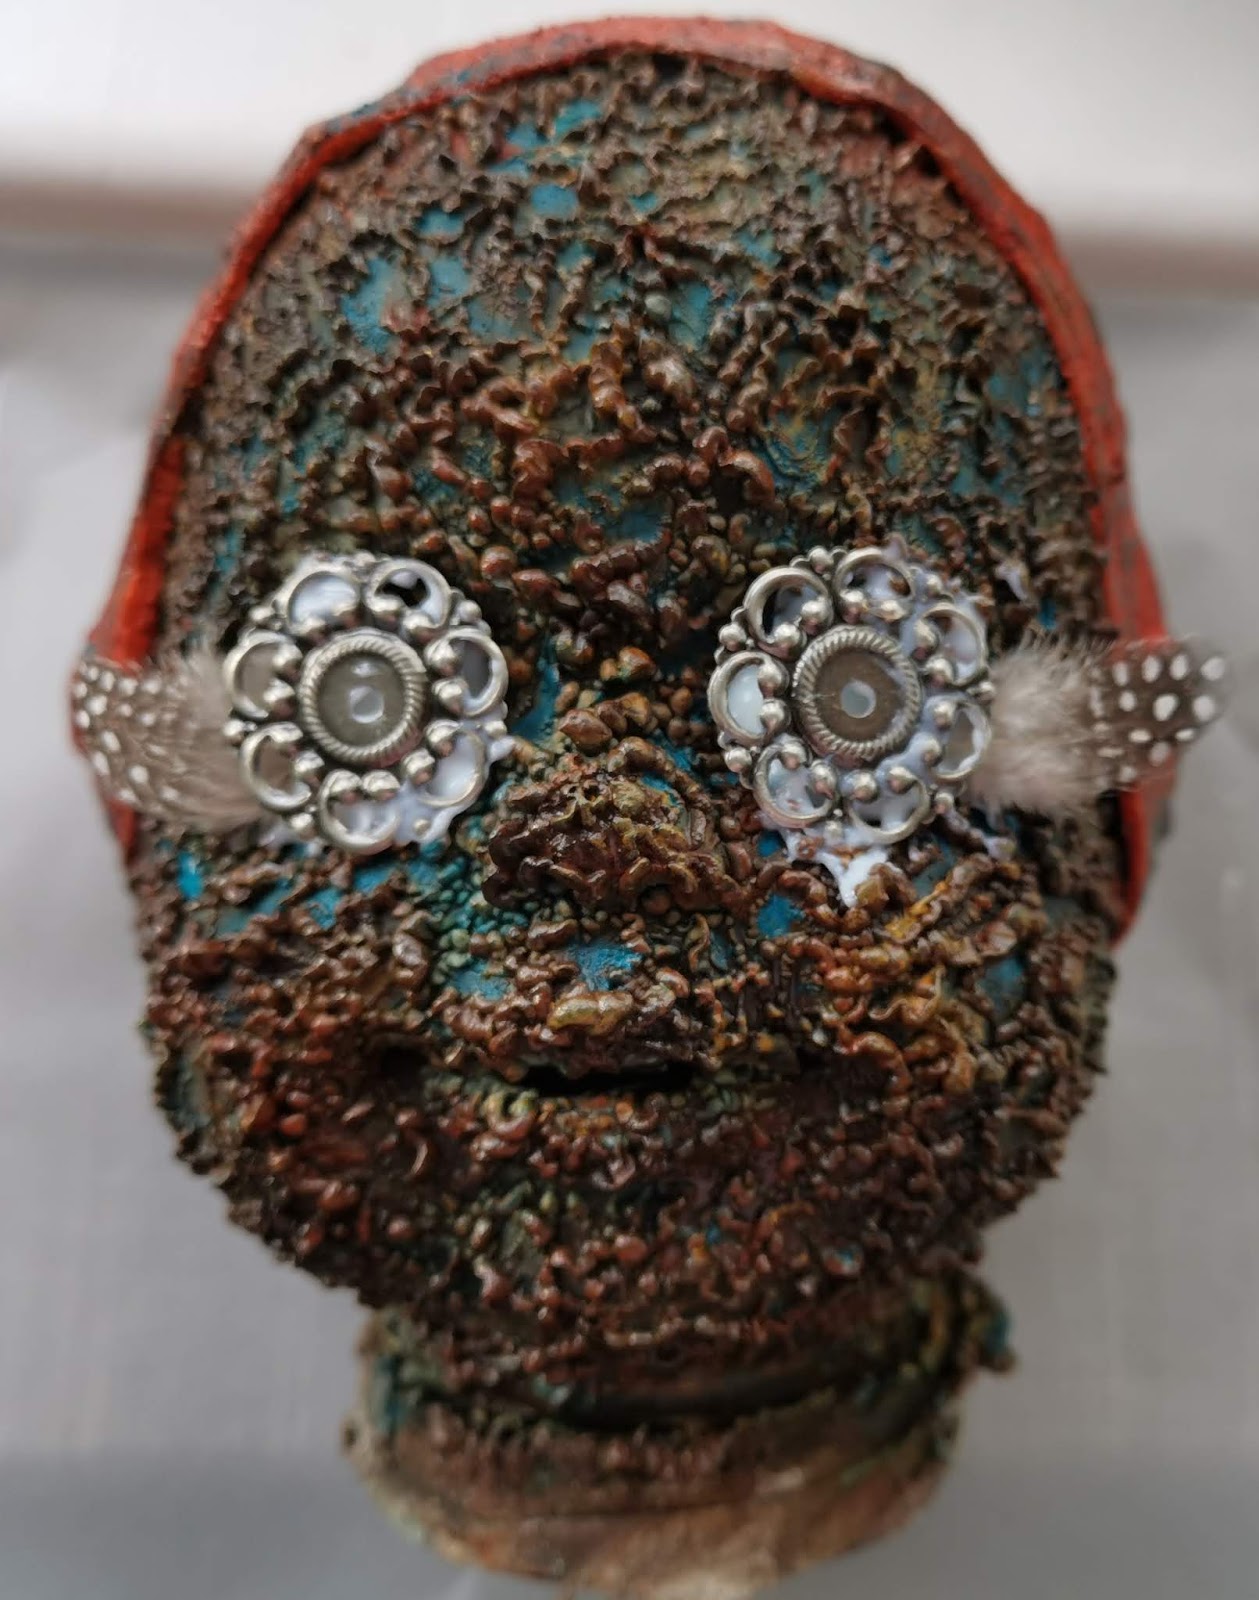
Industrial Altered Dolls Head for my Andy Skinner DT project.

Hi all
Yep, a totally weird one from me today for my Andy Skinner DT project this month.
I've had this tatty, bald dolls head for years. 
Time to use it or get rid of  it. And what better products than Andy's Lava Paste and his new 
Creative Expressions paints to give it a revamp.  Here's how it turned out.
Here's how I made it....
I took the dolls head, painted it with black chalky finish, then a coat of rust all over, even the eyes. Which then looked awful! Then layer a thin amount of the Lava Paste with a palette knife, like icing a cake. But for even more texture, then dab the palette knife up and down all over, the paste holds itself into little peaks.
 If you heat activate the lava paste you'll end up with something like this.
 Layers, and layers, and layers or paints in the rust, Quin Gold, Yellow, and Cobalt Teal.
 More layers - dabbed on with a sponge.
 I used plaster wrap all around where the hair would be to cover up the stubby bits and create a hat or skull cap type head cover. Then painted the hat with the quin gold, bit of rust and cobalt teal.
 More teal dabbed in to face area...then more and more layers of paint until I was happy with it.

Needed to cover the eyes as they bothered me. So feathers and metal 
embellishments from my stash transformed it from horror to industrial!
 A bag of bits from Wilko, think this bag cost about £2.50
Out comes the wire. I used it to make a metal headband. Then hooked it in and out of the holes on the base of a very old cake tin, to make the wire cage. A few more feathers on top, along with another metal embellishment to hide the stalks of the feathers and it's done.
Thanks for looking.
Suz
For a list of all the products, check out my post on Andy Skinner's blog.

Friday, 11 October 2019

Happy Halloween Skull Frame

Hi there.
My project for the October Craft Stamper Challenge Blog DT this month is this fun Halloween framed skull. There are some gorgeous Prima Moulds to be win, take a look here
I made stamped and coloured this fun skull at the same time as another one I have details of in my previous blog. For this one I used Andy Skinner Super Nova Media embossing powders to emboss his Skull stamp, coloured it with Distress Oxides and enhanced with markers and added gems to the eyes and chin.

 I decided which of Andy's new transfers to use on the frame. You can hold the see through sheet to offer up the designs against your base to help with placement.
 Then to ink up the mount that is inside the frame.
 I made it quite bright!
 Added the transfers - I LOVE them! And a bit of pen doodling to fill the empty space
 Then onto the gold frame...
 A coat of DecoArt chalky finish paint in Relic, which is a very dark, beautiful grey. Then I rubbed it back a bit to let some of the gold shine through. I stamped Andy's Grunge Wallpaper stamp and embossed with the Super Nova onto black card for the background.
Decided the skull was going on top of the glass for a bit of a change!
Used Metallic Lustre in Iced Espresso on the inside of the mount as it was a little discoloured, plus I just love the colour! 
 I wanted something pinging off of the frame so chose Andy's Gypsie Queen stamp, again stamped onto white card, but this time I used Wow white embossingpowder - and made sure I wiped the card with an anti static pad before stamping for a crisp image.
 I added some twisted rusty wire to suspend the moth.
 I found some rainbow coloured threads I've had for years, they colours went really well so I chopped some off and stuck a bunch behind the skull.
 A bit of double sided tape holds them up at the top, the rest are stuck underneath the skull.
 The 'Fig 746' image is part of the moth stamp, by putting it in the opposite corner to the moth it balances the project.
 I was really enjoying myself by this stage. 😍
Love how the flying moth looked.....gave her a selfie. 
And here is the finished piece. I with you could see how

Friday, 13 September 2019

Life Without Art Passport Book for the September Craft Stamper Blog Challenge

Hi all
This month sees another fab couple of prizes to be won in the Craft Stamper Monthly Blog Challenge. A gorgeous set of Posca Pens along with a handy case to store them in. Have a look here!
Here's my DT project for the challenge.
I've been getting out my Eileen Hull dies in the last few months, trying to tackle how to use them and different ways to add the paper signatures. I'm also madly into textiles and embroidery too at the minute. No embroidery in this one, but some fun stamping and painting onto calico.
 I used a scrap of thick card from the back of a paper pack for the journal covers and spine.
Vintage book pages from a fab book called "Enquire Within Upon Everything" dated 1861 which belonged to Betty! I started to read some pages while I was working and it's amazing. Don't think I can use any more! According to Wikipedia: Tim Berners-Lee named his precursor of the World Wide Web, ENQUIRE, after this work in 1980.[7][8] A Forbes article quoted Berners-Lee as saying:[9]
Back to the project....I stamped one of Andy's new stamps onto a piece of calico.
Stamped it out again to make a mask, which I used to cover up the quote. 
Took another of Andy's stamps and masked off the text inside 
the circles as I just wanted the rings...  
 Stamped it a couple of times over the words.....
 Then started to paint the fabric with DecoArt Fluid Acrylics in Phthalo Turqoise and Quin Gold.
 Then added some Quin Violet around the outside.
 Here's where the book pages come in; I used the leftover paint to 
colour them and glued them to the inside of the journal covers.
 Then I used the diluted quin gold on the spine. I love how it looked, I think I must have had matte medium on my hands from gluing the book pages when I was handling the spine and it acted like a resist, giving a great grungy look!
 More quin gold on the outside of the book cover, that I 
was going to glue the fabric onto, just to base coat it.
 Matte medium to both the cover and the back of the fabric.
 I felt the focal stamp image was getting a little lost so I re-stamped it onto 
tissue paper.....but it wasn't popping enough - so I stamped it again onto painted book 
page that I'd painted white and that worked just right.
 I edged the torn book page with quin gold paint then glued it down with matte medium. The brush I used still had a little blue paint in it, so there are some lovely hints of the colour on the paper.
 I stamped another of Andy's stamps using Titanium White paint around the edges-
paint needs to be washed off straight after to keep the stamps in good condition.
 Then stencilled flowers using crackle paint....
 Once the crackle paint was dry, I added a wash of Cobalt Teal, and a little more quin gold around the tissue paper. A few gems to lift the flowers and the cover was finished. I die cut some recycled pages to create two signatures and now it's ready to use.
Thanks for looking, and if you have any questions just leave me a comment. 
Suz
xxx