My little crafting world....


Hi all
I'm a complete craft addict! I have a small business called Surrey Crafts teaching craft workshops from my studio in Esher, Surrey and at venues around the country. I teach mixed media, decorative painting, card making and papercrafts, jewellery making and creative embroidery classes. If you'd like to find out more just leave a comment, or take a look at my other social media pages:
Facebook: https://www.facebook.com/surrey.crafts
Instagram: https://www.instagram.com/surreycrafts/
Pinterest: https://www.pinterest.co.uk/surreycrafts/
Crafty hugs & stuff
Suz

xx

Tuesday, 10 September 2019

Vintage Bicycle tag for Andy Skinner DT

Todays blog is a vintage tag inspired by Andy Skinners bicycle stamp .
I covered a tag with music paper and a torn vintage book page from a very old (about 80 years) falling apart accounting book that belonged to my lovely Betty 
who passed away a couple of months ago.
 Using a dye ink pad (antique linen) I swooshed across the tag.
 Then added some almost invisible stamping using another of Andy's stamps
(grunge wallpaper) and brushed corduroy ink.
Then inked through Andy's cogged up stencil with bundled sage - but the blending tool had some darker ink on it which really made it stand out more than I'd intended, I soon knocked it back with other colours. I also added bundled sage to the other areas of the background.
I didn't photograph the next step, but once the tag was completely dry, I added some Versamark Clear ink and popped on some embossing powders. Loved how this this gave a steel look on the tag.
 I took out a napkin, and using the white layer in the middle, I stamped the bicycle, tore it out and glued it over the embossing enamel.

Then I had to eat a chocolate to get some lovely gold foil paper! Glued that down. 
You can see the grey embossing powder in the background. 
 I wanted to add a flower to the tag, so stamped out the wheels of the bike using the Raspberry Ice Cream, and when I added some spritzed Vintage Photo ink and Brushed Corduroy - I LOVED how it looked. So I chopped the wheel up, twisted it and glued it into a flower shape.
Here are the wheels before I chopped the up.
Used these two colours on white card, then stamped using the 'Create' stamp.  
Inked up around the edges with the vintage photo, added a little more of the tissue paper under the text to help it show up.
A nice big pearl in the flower and three tiny ones on the vertical gold foil and then it was finished.
Below is a pic of all the products. 
 I really enjoyed making this.
Thanks for looking.
 Suz
xxx


Monday, 26 August 2019

Festival Bag Decoration featuring new products by Andy Skinner

Hi All
So excited we can finally share some of the fab new products by Andy Skinner and Creative Expressions!
I was desperate to use the Candy Skull Stamp and lush embossing powders.
 And I have the prefect little back pack for the project I made.
 I inked up paper first, then stamped using Archival Ink.
 Then to add vibrance, I dotted on Pyrole Red, then Primary Yellow DecoArt Fluid Acrylics.

While that was drying, I took a slice of wood from a tree we had to cut down last year, painted it with Gesso then sprinkled on the gorgeous Crystal Graze embossing powder, also recently released.
I stamped the skull out again and painted the rose and leaves on the forehead, and all the other flowers in the stamp, with the Pyrole Red and Green.
 Sizzix dies, gems, feathers, an old repurposed earring (the dangling parrot!)  and beads all added to embellish this fun image.


Friday, 9 August 2019

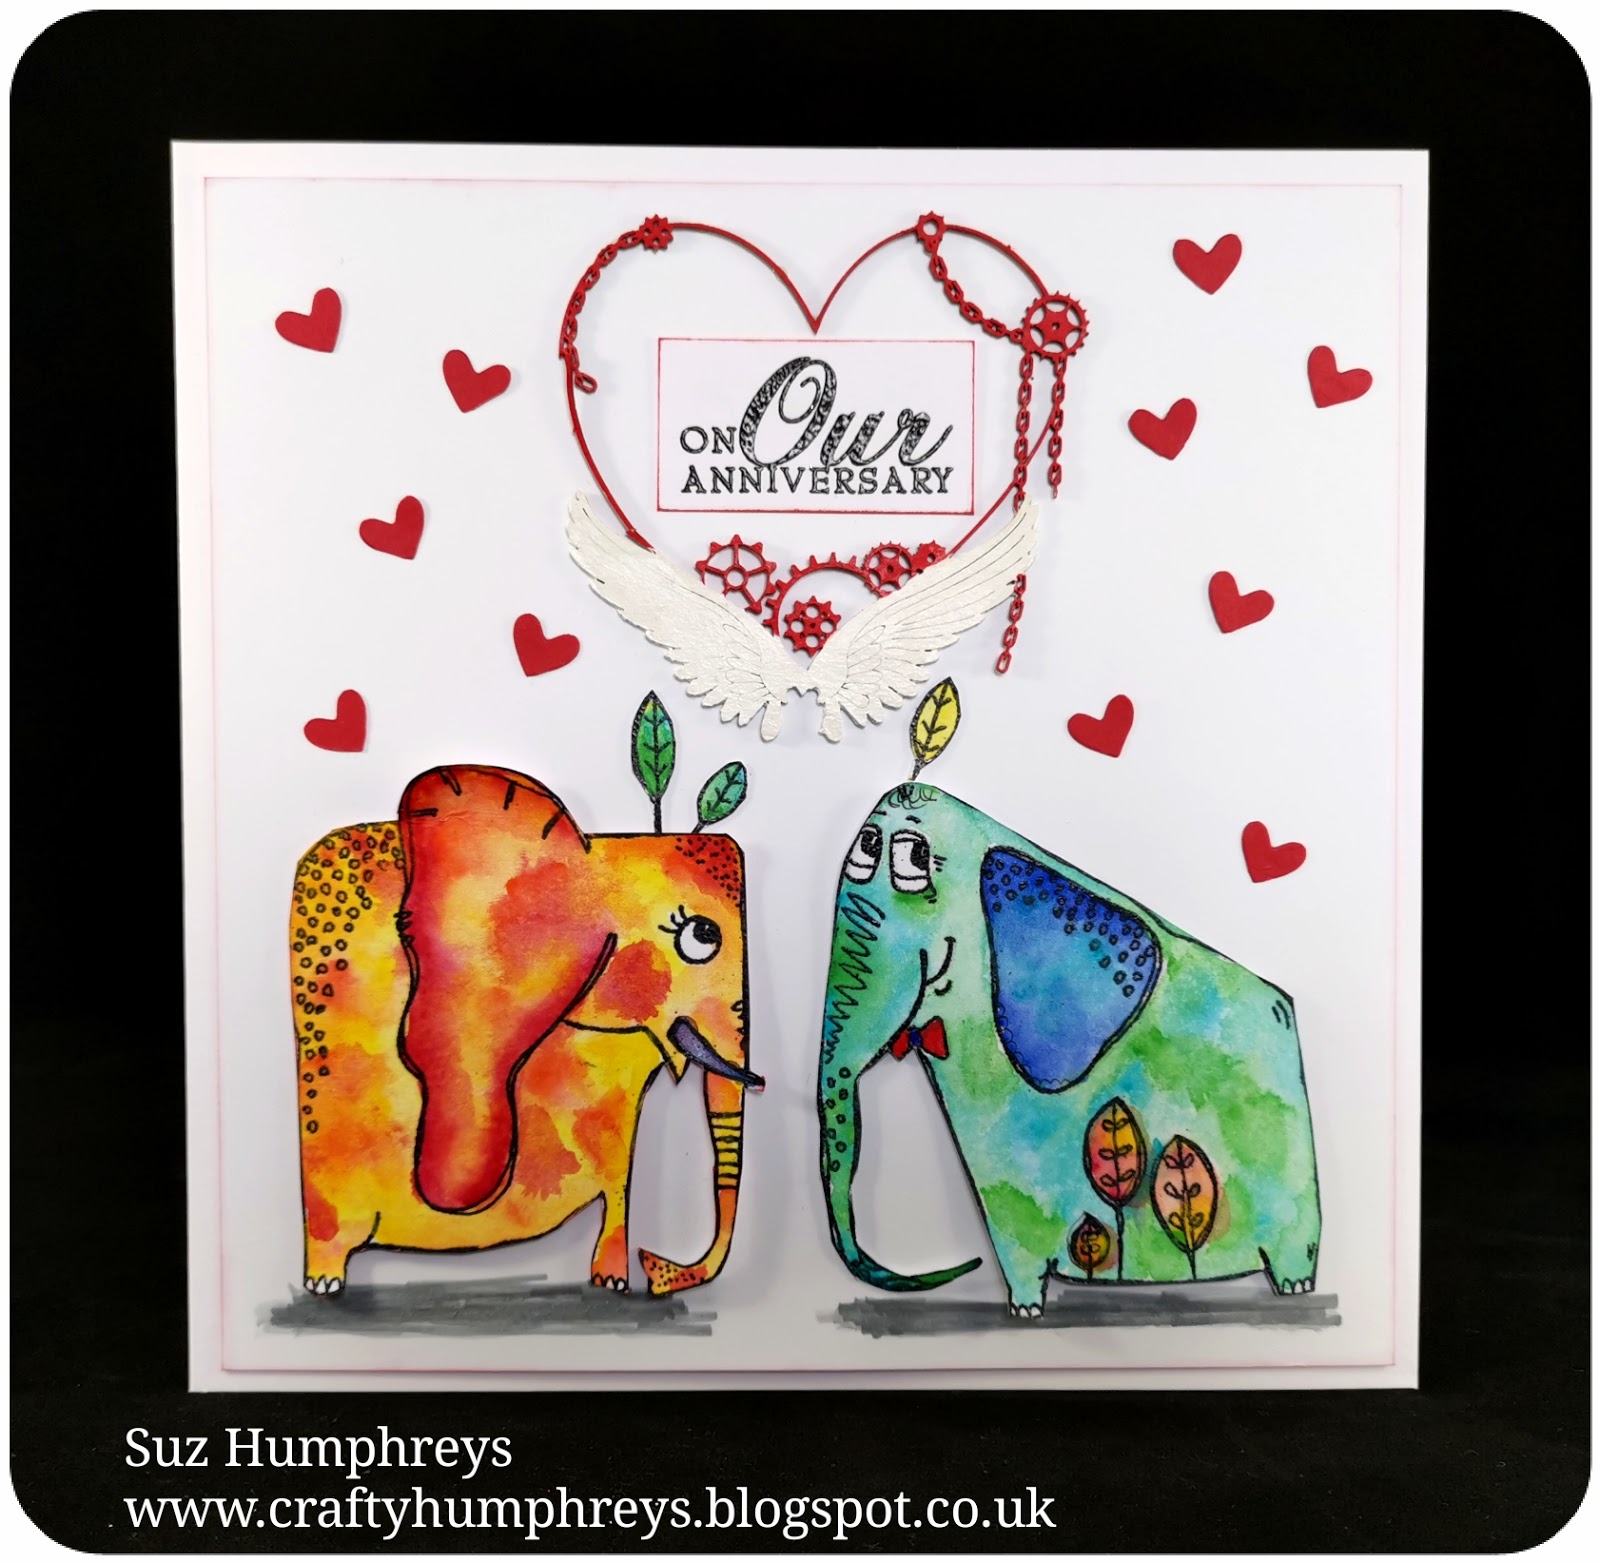
Elephant Anniversary Card for CS August Blog Challenge

This month for the Craft Stamper Blog Challenge, I've gone all romantic and made this card for my hubby for our 27th wedding anniversary! There are (as usual) lovely prizes to be won in the challenge, AND a chance to be featured in the mag! Take a look here.
PaperArtsy stamps, stamped with Versafine, watercoloured with 
DecoArt Media Fluid Acrylics and fussy cut.

I was going to use this die cut design in the background, but changed my mind and used a very pretty chipboard embellishment by Scrapiniec instead.  I cut out the hearts from the die cut to dot randomly in the background.

I cut a base layer of white card just a little smaller than the card blank.  
Inked the edges with Fired Brick distress ink to lift if from the base card.
The heart chipboard embellishment was painted with Pyrol Red and Titanium white.
A couple of the little Paperartsly stamped leaves painted, cut out and added to their heads.  Then stamped out the sentiment from a Papermania set, adding some white dots to the larger letters. Added a bit of shading underneath the ephalumps and that completed this simple, colourful card.
Hope you like it, hubby did. ❤😍
Thanks for looking
Suz
xxx

Tuesday, 30 July 2019

Creatures of the Deep, Andy Skinner DT

Hi all
Here's my project for Andy Skinners DT, featuring loaaaaads of his new products and lots of pics of how I used them. I hope you like it.
 I took 3 sizes of greyboard by Tando Creative and gave them a coat of DecoArt Gesso
 A second coat of gesso, and while still wet, I blended in 2 fluid acrylics; Phthalo Turquoise and Cobalt Teal Hue.
A generous layer of DecoArt Crackle Glaze (really fine cracks with this), and once dry, a layer of white antiquing cream, not sure why I put the turquoise paint in the pic!
Close up of the cracks with the antiquing cream, very subtle.

I wanted to use the AWSOME Lava Paste for the texture of the sea bed, but also to see if you could colour the Lave medium before using it, which you can! It looked really dark after I added Burnt Umber and Carbon black mixed together, see below.....
But it did lighten quite a bit once I'd heat activated it, which was perfect for this - but I'd have added paint on top if I needed it really dark again.
Using a fine brush, I painted seaweeds on all three. Then for the middle sized board, I added one of Andy's new rub on transfers from the Alchemy Plus set.
I painted over it with Titan Buff and Metallic Gold, keeping within the outside lines.
There are two sets of transfers in each set, so I was able to use the first as my guide for painting...
And once the paint was completely dry, I went over with the second transfer.
I stamped Andy's fish skeleton stamp 'Dem Bones' using gold paint, then Versamark ink with one of his new embossing powders; Super Nova, but the gold didn't really show up, so I painted on a bit of the Metallic Gold. I also stamped his Seahorse but left that piece out in the end as I liked the 3 little ones together. I used up the spare metallic paint by dabbing a tiny bit of gold over the top of all the Lava Paste.
Added a teensy bit of Phthalo Green Blue back over the top halves of each shape for a bit more sea like colour, hardly noticeable. Also neat Phthalo Turquoise around the edges of each piece.
To highlight the plants and fish, I used a fine liner with Titanium White paint. For the shading - to give the fish a bit of depth (see what I did there, sea, depth....) I used a black Stabilo All watercolour pencil, dragging out the black for a watery look.
Pyrol red dotted on all the eyes gives a bit of colour and character, and the cheesecloth (a bit of old bandage) ties in with the sea theme.
Another transfer, a word this time, also highlighted with white paint.
I put the pieces together using a strip of hessan and the bandage, which I stapled on - my stapler opens right out so I could use it even on these thick pieces. Then some repurposed string, tied top and bottom around pieces of driftwood and it was finished!
I loved playing with all these products, and I hope you like it. Any questions, leave me a comment.
Thanks for looking.
Suz
xxx
Oh and here's a pic of the products used, and a link to Country View Crafts where you can find most of them. 😊

Friday, 12 July 2019

Silk Painting Flamingo using Hobby Art stamps

Hi all
My post this month for the July Craft Stamper Challenge is a fun flamingo card, using Pebeo silk paints and stamps from Hobby Art.  There are fab prizes to be won this month by one lucky winner and a chance to be featured in this amazing magazine, why not have a go! Click HERE to have a look.
I'm running a silk painting class in just over a week and was curious to see if stamping onto one of the silk fabrics I'll be using would work.

First attempt at stamping directly onto the fabric failed! So the second time I inked up the stamp using the beautiful, Vibrant Fuchsia Archival Ink (one of Wendy Vecchi's) then laid the fabric on top and brayered over the back of the fabric.
It gave me enough of an image to then go around with  a fine black Micron pen, that made it easier for me to see the image and add the Gutta Outliner (which creates the barrier on the fabric to stop colours running into each other). 
Then it was just a matter of mixing the silk paints (Pebeo Settasilk) to get the colours I wanted, and gently painting them onto the fabric.
Then comes the hard bit....how to bring it all together....
I framed the picture by using an aperture card from Hobbycraft - these were disappointing as only had one aperture side and a blank side, normally a decent aperture card would have a third panel. So to make it work I had to stick the fabric inside the aperture card, then trim the whole thing down a bit so I could glue it onto another separate card blank. To finish off I added some faux stitching with a marker pen around the edges and circle, then added the stamped sentiments and a little bow.

Hope you like it.
Thanks for looking.
Suz
xxx