My little crafting world....


Hi all
I'm a complete craft addict! I have a small business called Surrey Crafts teaching craft workshops from my studio in Esher, Surrey and at venues around the country. I teach mixed media, decorative painting, card making and papercrafts, jewellery making and creative embroidery classes. If you'd like to find out more just leave a comment, or take a look at my other social media pages:
Facebook: https://www.facebook.com/surrey.crafts
Instagram: https://www.instagram.com/surreycrafts/
Pinterest: https://www.pinterest.co.uk/surreycrafts/
Crafty hugs & stuff
Suz

xx

Friday, 9 February 2018

Craft Stamper Blog Challenge project: Repurposed gift card holder and tonic bottle

Hi all. 
Here's my inspiration for the February Craft Stamper Challenge.
Have a look at the full challenge details and some gawjus projects by the team click here!
Lovely Auntie Betty gave us a John Lewis voucher for Christmas. I knew she'd love me to make something with it, so I painted it with DecoArt Chalky Finish paints in pink (Innocence) and white (Everlasting) along with a tag from Tando Creative which fitted perfectly! 
 I stamped these gorgeous stamps from Andy Skinner's new range of Stampendous Stamps (which will be released next weekend and will be available on Andy's Blog ).
I stamped them in light and dark grey archival inks. 
 I then used some of my fave Metallic Lustre called Iced Espresso by DecoArt, crushing it on my glass mat, adding water and just lightly brushing it over the projects.  Sometimes it looks dark brown, sometimes gold - I love it! 
I added lots more lustre around the edges, then stamped some of the flowers
from the same stamp set onto pink paper and cut them out.
I only used the ones stamped in brown in the end as they looked better with the lustre.
 Added lace and a strip of sparkly stuff from my stash.
 I had some embellies made from moulds and paper clay (heart) and jewellery cement (the butterflies) so painted them with the same products as the substrates. 
 I used the same chalk paints on the little tonic bottle. Then inked up the largest stamp from the set (a kind of vintage wall paper) with the grey archival and rolled the bottle over it.

 Added some text in a brown colour, and then painted on some metallic lustre (you can see it in the pics below) to match the tag and card holder. Lastly I added some of the same lace and bling to the bottle and tag. Then embellies, plus a bit of wire shaped into hearts and twisted to create a stem.

Here are all three part of the project. 
Products used:
http://www.andyskinnercrafts.com/stampendous.html

DecoArt: Chalky Finish paints in Everlasting and Innocence, Metallic Lustre in Iced Espresso

Archival inks in greys and browns

Substrates: Repurposed gift card golder and dumpy tonic bottle, plus a Tando Creative Tag

Other products used: Lace, bling, hand made embellies


Wednesday, 31 January 2018

'Dead Stylish' Tag my first post for Andy Skinner

Very excited to get my mucky paws on Andy Skinners new
'Spook' stamps set and make my first project
as a member of the Creative Team!!!
Here's a fun tag, and how I made it. Links for the products I used can be found on Andy's blog and the end of this post.  
First thing I did was to immerse the thick greyboard tag in a bowl of cold water for about 3 minutes so that I could split it into several thinner tags!
I usually do this when embossing Tando greyboard pieces as it makes it easier to run them through my machine, and the embossing is more defined. Make sure the layer is dry before you start to work on it. 
Don't worry about leaving the tags in water for longer, I've come back a couple of hours later and the shape is still in tact in the water and doesn't split until I pull it apart.
I randomly painted the embossed tag with 3 colours of DecoArt metallic paint (Tin, Emperors Gold and Zinc).
Once dry I very lightly added in two more metallic colours (expresso and Copper), dry brushing them across the embossing.

Using a Pyrography tool, I carefully singed the edges of the tag (be cautious if you try this, it gets flippin' hot - and could set fire to the tag if you held it there for much too long. Have your water pot handy in case it does - or to put your hand in if you burn yourself trying!!!

The 'Ouiga' stamp on this set is a fantastic alphabet set! I stamped and embossed the whole thing twice and cut out the letters I needed (saved the rest for another time). I stained the white paper with Andy's famous dirty wash of Paynes Grey and Quinacrydone Gold. Painted a white bit of card with Pyrole Red, glued on the cut out letters and tore around them to get the tatty ripped edge around the words.
I stamped the skeleton onto white card a few times. Coloured various bits and once I decided which colours I liked, I cut them out and layered them (paper pieced) onto a plain heat-embossed image and cut it out.

After gluing the image and words onto the background I felt it needed something else, and found this piece of bronze jewellery wire.

I'd decided to use the skulls from this set too, just for a play. Stamping them onto white 'shrink plastic' and shrinking it down to this size with a heat gun....I punched the holes in BEFORE shrinking as it is so thick once you've done it. Using a bit more of the wire I twisted it through the holes to hang the skulls like a sign from the top of the tag.

Finally I made some spirals with the wire and fixed them at the back of the tag with Pinflair 3D gel, so they bent round to the front. All done!
Thanks for looking. Any questions please leave a comment, and click on the link under the logo below to access Andy's shop and see all the new goodies!
Enjoy, Suz x

Click HERE to access the store.

DecoArt products used:
Media Fluid Acrylics: Cobalt Teal, Titan Buff, Pyrol Red Quinacrydone Gold, Paynes Grey
Dazzling Metallics and Extreme Sheen: Copper, Splendid Gold, Zink, Tin, Iced Espresso

Andy's/ AI products used:
Spook Stamp Set and Sunburst Stencil

From my general supplies I also used Archival and Versamark ink pads, jewellery wire, shrink plastic, cosmic shimmer glue a hole punch and the pyrography tool.


Tando Products used:


Saturday, 20 January 2018

Airship project 2


While I was making my 3D box project (see other post) I decided to get ahead of myself for a change and make a card for my nephew who's birthday is in January using the same fab airship stamp from Chocolate Baroque. 

I stamped out the image onto Chocolate Baroque cartridge card and embossed with black WOW embossing powder to help resist the paint I'd be using to colour the card. You might notice it's the same pic as the box card post....cause I did exactly the same there too.
For the sky I dabbed a mixture of watered down blue DecoArt media fluid acrylic and white gesso which works better than normal white paint (which would just blend into a pale blue) all around the image with a large brush, then dabbed off with a tissue.
I used DecoArt metallic paints for the balloon and propellers and red media fluid acrylic for the basket. As this card was for my nephew, who is a helicopter engineer, I stamped more propellers to add to the top of the balloon onto scrap paper, cut out and stuck on - to make it a bit more helicopterish!
With a fine permanent Pitt Pen I drew over some of the black embossed lines I'd partially hidden with paint, then highlighted the whole image with a white Posca Paint pen to make it stand forward from the blue sky. Using a steel ruler I tore the paper to a square small enough to fit my card blank. I created a slightly bigger mat of blue card, 'roughed up' the edges with my distress tool. I stamped the happy birthday sentiment onto a scrap of the torn card and cut into a banner shape. 
I layered everything up and drew lines from the banner to the airship and that's it done!
Thanks for looking.
Suz x


Friday, 12 January 2018

3D Upcycled airship box for the Craft Stamper Challenge Blog

My first post as a DT member for the Craft Stamper Challenge Blog.
A colourful 3D Airship using
an upcycled box.


Just a fun little project to help celebrate the new year (although it feels a long time ago now!!!) and new beginnings.


I stamped this gorgeous image from the Steampunkery stamp set by Chocolate Baroque onto cartridge card twice (I used the other one for a  mans birthday card which will be in a post next see).
This little square gift box was begging not to be thrown away. So I gessoed it!
Two layers.... exciting ...! Zzzzzz
While the gesso was still wet I dabbed in some DecoArt media fluid acrylic in Cobalt Blue with a large brush, picking up more gesso to give a sky like effect.


Chopped up a loo roll.
Rolled up the pieces and wrapped
masking tape around them.
Painted them copper metallic paint by DecoArt. These would be the legs, I did eventually add a little silver paint too to tone down the copper!

I used some Papermania stamps, embossed with copper embossing powder.
Took a strip of scrap paper, snipped into it so that
I could have the numbers upright in the box.


Like this!

I used some cute clouds from Tando Creative (see next pic). I popped them
 into water and after a couple of minutes split them, this way I get even more
from the pack  and they are really light and won't make the box fall over.


I wound some soft jewellery wire around a pen to make a spring for my airship.


I painted the airship with Aquatints

Using washi tape, I stuck the spring I'd made onto the back of the airship.
I was initially going to use it to stick the ship
into the box too, but it was a bit fiddly
and not strong enough.
Instead I decided to use Pinflair 3D glue gel. 
I laid the box on it's back,
stuck it down and let it dry.

And here is the finished project.
It'll help me to remember which year we are now in!!! Thanks for looking. Suz x


Friday, 29 September 2017

Topsy Toadstool with DecoArt Media products

I was asked by a lovely friend of mine Angela Dearlove, if I would like to decorate this pretty fairy house storage box.  She hopes to be showing it as part of a new range she is launching TODAY on Hochanda at (4pm on the 29th September, look out for Polly Allsorts. Her range with it's beautiful assortment of styles and sizes is called 'Polly's Whimsical Houses!). I loved the look and clever concept so no hesitation on my part! I couldn't make up the storage section to show you here as I was posting it back to Angela to take to the show, so I can't wait to see how it looks all made up. Anyway, I had a play and really enjoyed it, so here's the pre construction project and a step by step....
The finished door, on "The Topsy Toadstool".
 
Here's the original piece. So cute, so much potential and this is actually the working door hinged onto a generous box with a shelf that you can't see in the picture.

I gave each of the panels a coat of DecoArt Chalky Finish paint in 'Lace' on both sides. Once dry I rubbed down lightly with sandpaper. To add faux brickwork to various areas on the door and walls, I used DecoArt Modeling paste through a stencil and once it was dry, another coat of the chalky finish paint.


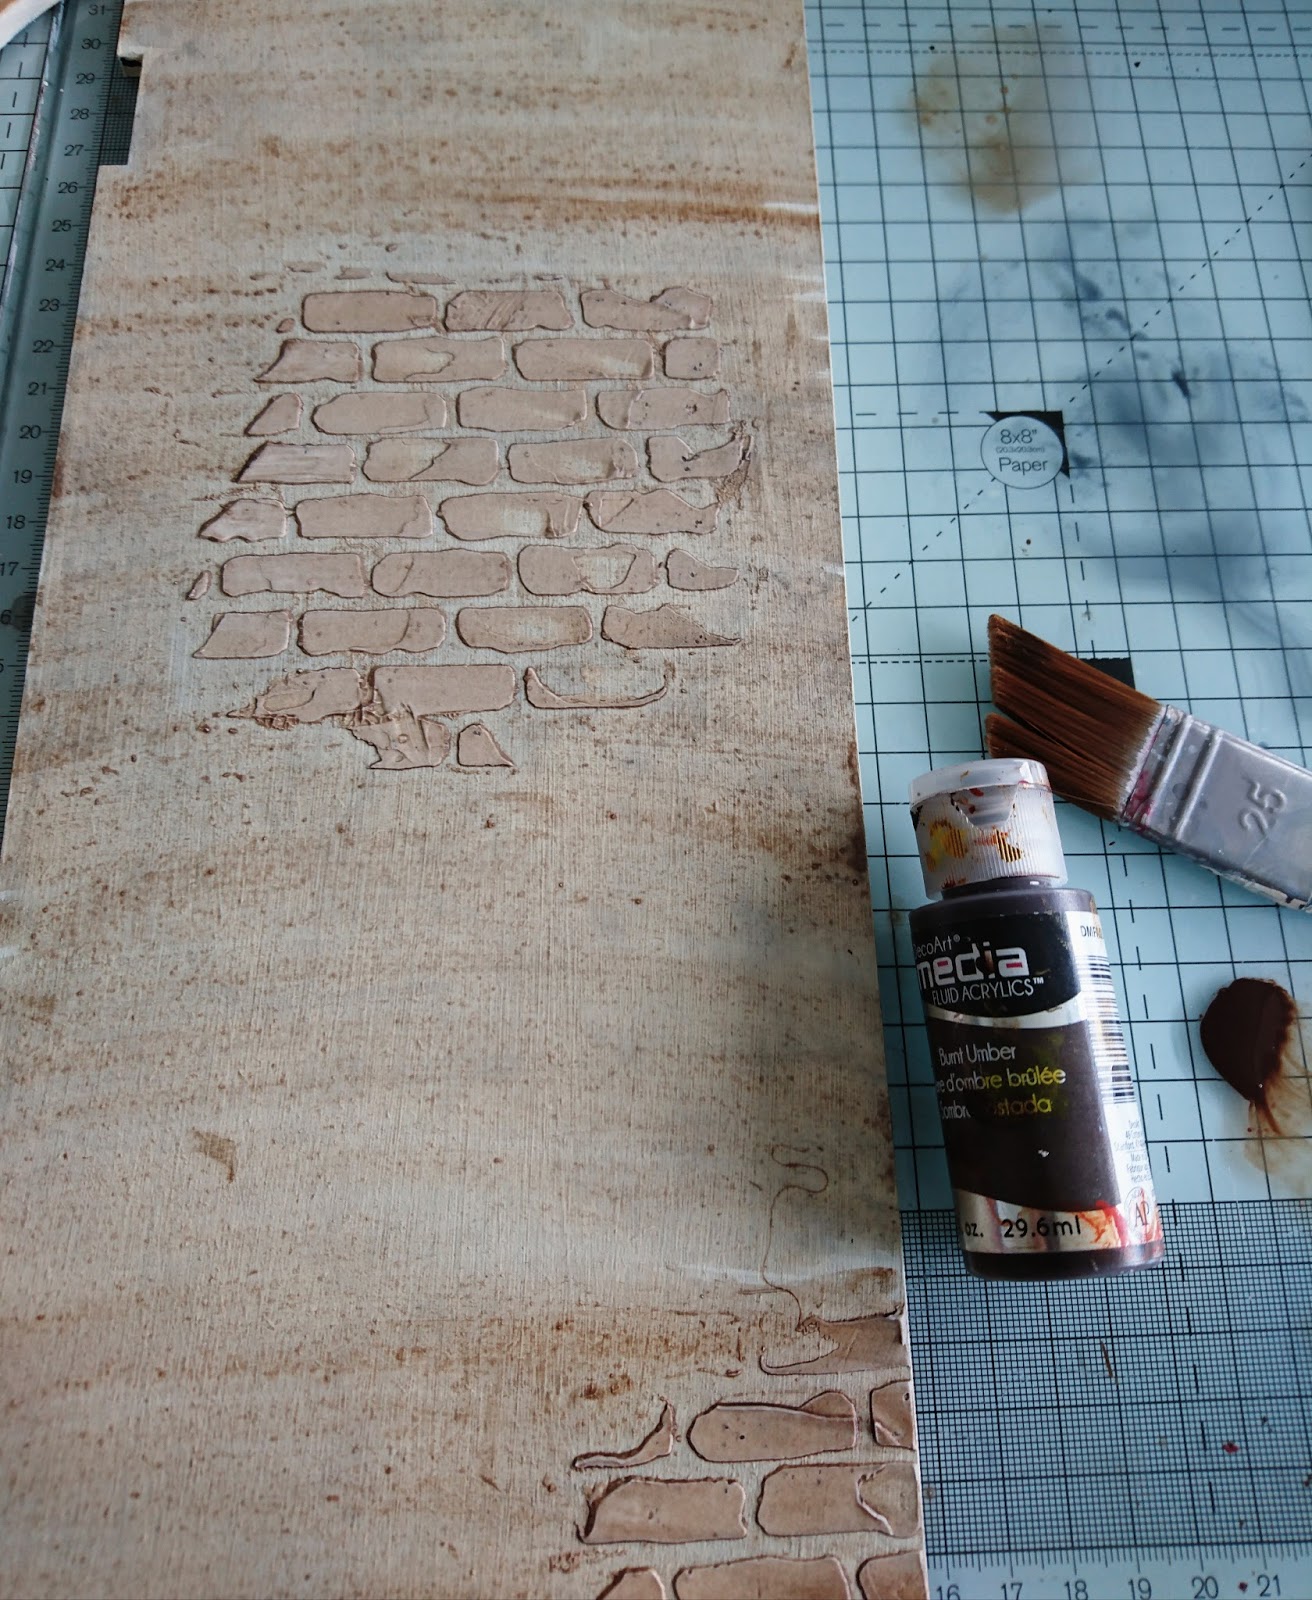
A very diluted wash of DecoArt Media fluid acrylics next. Firstly in paynes grey, this  gives a lovely depth to the bricks.

Then a wash of Burnt Umber. Repeat washes until you like the colour, dabbing off with kitchen towel to remove any drips and create variation of colour and texture.

How the washes of colour look once all done.
I painted the cute little door red, and the roof too, again using chalky finish paint in in Rouge. But then added a little shading using an angled brush to apply Burnt Umber...I love how that brings out the detail on the door and roof and adds an 'aged' feel to them (look at the main pic below).

To add a shimmer and highlights to the brickwork, I added some DecoArt Metallic Lustre in Champagne by using it as a watercolour paint.

I also wanted to bring out the curves of the roof, so added a generous amount of the lustre along the lines.


And once all the shimmer was on, I wiped it back to be a little more subtle. I also added it to the door knob which made it really stand out.

To give this pretty, rustic house a little country cottage feel I then used some of the techniqes I've learned through 'You Can Folk It' who are also regulars on Hochanda to add flowers around the door frame and wall. Colours used were Pyrol Red, Dioxazine purple, and green, all mixed in various ways with titanium white.