My little crafting world....


Hi all
I'm a complete craft addict! I have a small business called Surrey Crafts teaching craft workshops from my studio in Esher, Surrey and at venues around the country. I teach mixed media, decorative painting, card making and papercrafts, jewellery making and creative embroidery classes. If you'd like to find out more just leave a comment, or take a look at my other social media pages:
Facebook: https://www.facebook.com/surrey.crafts
Instagram: https://www.instagram.com/surreycrafts/
Pinterest: https://www.pinterest.co.uk/surreycrafts/
Crafty hugs & stuff
Suz

xx

Wednesday, 24 July 2013

It's been quite a week one way or another. But alongside all the dramas, I've remembered to make cards for my Uncle, who's birthday it is on Sunday and for My Nephew who also has an important event on Sunday because, after months of assessments, tests and waiting, he finally joins the Army. Good luck honey. Love ya. Here is the 'camouflage card' I for him made using leaves from a walk in the woods in Esher, hopefully he will think it's funny as his name is hidden under the leaves, though it doesn't look like a card from the pics (that's the beauty of camo!)! I then came across a lovely blog called 'Sketchbook Challange' whose theme just happened to be a walk in the woods - so I had to enter!


Thursday, 18 July 2013

Hi all

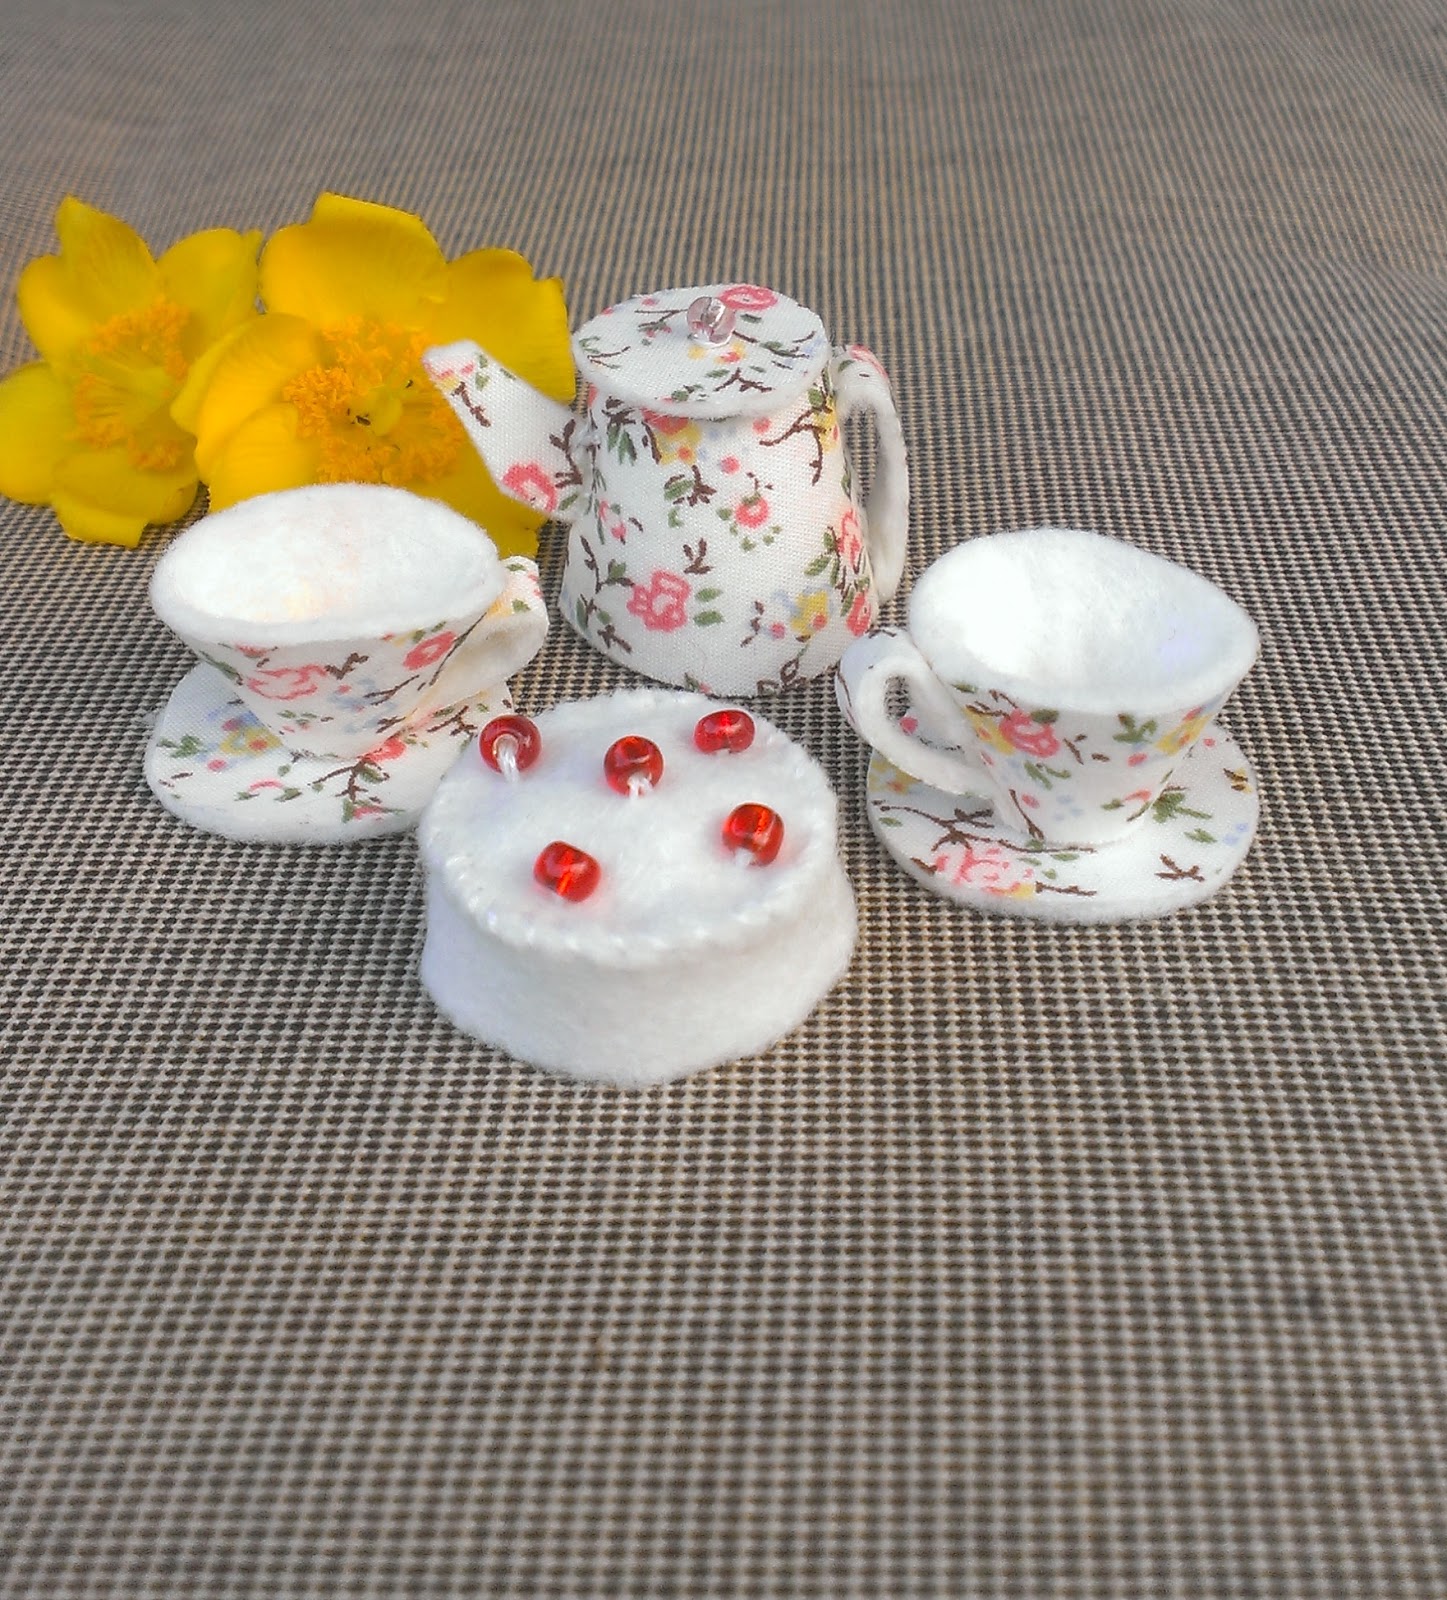
Here are a couple of textile items I've made recently, the canvas is my first attempt at Freemotion Machine Embroidery, which I made at a lovely workshop in Dorking (Gorgeous Gertie's where they make the most wonderful tea and cakes!). The second was a bit of hand stitching to make a tiny mini tea-set. Very therapeutic!
Suz
xx
 

Wednesday, 17 July 2013

A couple of fun cards


Two fun cards I made last month, sorry about the lighting, I've been a bit short of time lately!
The first 'Fab 40' card was stamped and coloured with Promarkers, mounted and layered onto two die cut rectangles with die cut greeting and ribbons added onto a spotted background paper.

The second 'water droplets' card is a little bit different as it has a scroll which can be unrolled to reveal the sentiment I've shown below it. I inked white card with blue distress ink (Ocean) stamped the image with archival black ink, removed the blue ink from inside the water droplets just by adding water and blotting. Once dry I then glazed with glossy accents to make the water pop.

Hope you like them.
Suz
xx

Saturday, 29 June 2013

Friday, 28 June 2013

For those of you who like twitter, I made a little birdie!!

Saturday, 15 June 2013

Finished another fabby workshop at 4.30pm then straight to this purple combo using the paper flowers we made in the workshop! Speed crafting at it's best, Not a great pic as the light was fading by the time I'd finished, lol. Suz
I took a round board, painted with Fresco 'Squid Ink', stencilled with 'rose' & 'moonlight' fresco paints all around the outside. Went back over the bottom stencil with Paperartsy Grunge Paste (such fun!!).
 
Stamped an image and embossed with holographic 'Wow' embossing powders, cut it and added a bow.


Took several yellow paper flowers we made in the workshops (the first flower pic shows one the original colour), spritzed them with Luminarte Radiant Rain in purple 'Snapdragon'. Dried with a heat gun and re shaped, then added some Pebeo Silver Guilding Wax & some ribbon. Finally I printed out a sentiment on copy paper, tore it out, inked it and hey presto!
 
 
Now look at the state of my hands while I'm typing, he, he!! Well I had to upload the link to Hel's Sheridan's blog (http://pinkleart.blogspot.co.uk/ ) by 9am to enter the Sunday Stamper Challenge so didn't have time to wash them - don't tell Captain Sparkle - aka hubby!!!

Saturday, 1 June 2013

This was a really quick card to do. I threaded ribbon through the holes in a shaped card which I made into a stepper card and put more of the same ribbon across the bottom panel. I inked white card with Tim Holtz Salty Ocean distress ink. Stamped this beautiful Water Droplet stamp from Designs By Ryn: (http://designsbyryn.com/index.php/shop1/#!/~/product/category=2559654&id=11297725)
I then used Glossy Accents on the droplets to make them really shine. Once dry I spritzed with water and blotted, so the surrounding card was lighter than the droplets. Layered this onto white then black mats and added the Dream Sentiment from one of Ali Reeves stamp sets. I punched two circles, inked the smaller one, threaded ribbon through the button, stuck to the circles on top of a feather & voila!