My little crafting world....


Hi all
I'm a complete craft addict! I have a small business called Surrey Crafts teaching craft workshops from my studio in Esher, Surrey and at venues around the country. I teach mixed media, decorative painting, card making and papercrafts, jewellery making and creative embroidery classes. If you'd like to find out more just leave a comment, or take a look at my other social media pages:
Facebook: https://www.facebook.com/surrey.crafts
Instagram: https://www.instagram.com/surreycrafts/
Pinterest: https://www.pinterest.co.uk/surreycrafts/
Crafty hugs & stuff
Suz

xx

Saturday, 11 May 2013

Fab new stamps by Ryn http://www.designsbyryn.com/
 
 
This card is made using Ryn's Spiral Shell stamp
After colouring white Centura Pearl card with a Big and Juicy Waterfall ink pad, I stamped three spirals using clear Versamark and White embossing powder, then lightly rubbed over some Stickles to give a little sparkle. I layered this onto turquoise paper with more dabs of Stickles and two rows of sequins then onto a pale blue base card. I stamped a sentiment from Hobby Art onto more white card, die cut with a spellbinders die and inked with more Big & Juicy, added a couple of sequins to the corners and voila!  
 

This one is Ryn's beautiful Angel Fish Wanda & her Seaweed set http://designsbyryn.com/index.php/shop1/#!/~/product/category=2574165&id=11345799
I stamped and embossed Wanda in Gold, coloured her in using Promarkers (tea green/ china blue/ blue pearl/ soft green/ sky blue/ cyan & mint green flex markers). Blended the background again with the Big & Juicy - more in the green end - then used it to stamp the seaweed set. I dipped the edges of the card in my Versamark pad, then gold embossing powder and embossed. Then I added blue ribbon to green card which I edged with treasure gold gilding wax, and layered them onto a shaped card which I edged with more ink. Sentiment is another Hobby Art fav. More Stickles for the bubbles!

Friday, 10 May 2013


I've purchased some beautiful new stamps from a Canadian Designer (see Designs By Ryn links all around these posts) and I'm having a great time playing. I'll finish more projects and post pics and tutorials and details of the designer over the weekend.....watch this space cause she's fab!
Suz xxx

Right, here's how it came together: I started with a square background of white Centura Pear.  I scrunched up copy paper, pulled it back into a flat but crumpled shape, loaded up my brayer with Waterfall Big & Juicy ink, rolled the brayer across the scrunched paper which gave a texture pattern on the brayer, then I rolled the brayer across the white card to give the watery effect. I stamped & embossed Ryn's Wanda onto the background, coloured in using the Promarkers listed above, added highlight with stickles. I chopped around the fins before die cutting with a circle die so that the fins were outside of the die to give the decoupage look. I then die cut turquoise card with a scalloped circle, highlighted with Stickles around the edge and then added these layers onto a shaped card which I'd also stamped with Ryn's seaweed stamps and inked around the edges with Waterfall.
Great watery fun!

Tuesday, 30 April 2013

An update on the Wings


In the last post I'd played with some fabby new Paperartsy Grunge Paste using the beautiful wings stencil. I've now added some 3D elements (heart and flower) made from various UTEE using my new MELT POT and didn't even burn myself! I stamped the butterflies onto acetate using Stazon then used bits of an old broken bracelent to glam them up and add to the bottom of the heart. Some feathers, a flower and hanger made with jewellery wire, and two die cuts in black card then covered with the guilding waxes (Spellbinders Shapeabilities 8). I added a strip of roughly cut hessian, printed some of my own sentiments onto white card, painted them with the Fresco paints used on the background and again edged with gold guilding wax.

Tuesday, 16 April 2013

Playing with Paperartsy grunge paste and new stuff from Ally Pally!

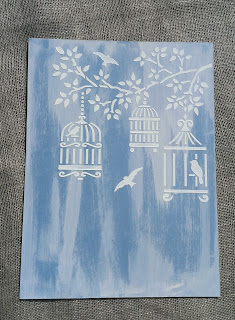
I had a fab time at Ally Pally on Sunday. Purchased lots of 'necessary' items. Here are a few pics of my first ever play with the Paperartsy Grunge Paste.....I got a bit carried away and made several at the same time so only got as far as using Fresco paints and the Treasure waxes on the 'Wings' artwork.  Will post pics of all the grunge artworks when completely finished....though I like some of them as they are and might just add some sentiments and bling to the birdcages!


Love these 'special touch of mica' masks, will be using them and more at my next workshop on the 27th April.

Friday, 5 April 2013


Here is the card I made for my Daughters 18th birthday on Tuesday. So many different techniques from stamping to stencilling, wire work and textiles, and as usual the Acetate nearly got the better of me! Tutorial below:


Covered some mount board with an old book page, painted it with pink and white paint and used a mask to stencil the puzzle shapes with white pearl acrylic paint (my Daughter will do a 1000 piece puzzle in two days!)
I shaped some jewellery wire, glued on some pearls, added the charms to chain and threaded it through some lace.
I cut out the number 18 and the words on my Cricut mini, added clear Versamark ink and embossed them with Frantage embossing enamels.  I added the number to the mount board and the words to acetate, which I scored and folded around the mount board to create a raised level. I then added this whole section to a piece of white card, which I'd stamped with roses and again embossed with Frantage. All papers were edged with gilding wax. Finally I attached these to the front of a strong card blank made from Centura Pearl 300gsm.
Thanks for looking.
Suz xx
 

Wednesday, 27 March 2013

I just finished my fab Sister's birthday card and this is the only place I can post the pic as I don't think she's even aware yet that I have a blog! I loved the colours and might also use them for my Daughter's 18th Birthday which is on Tuesday!!!There is an acetate front which you can't really see. Hope she likes it!
Suz x
 
First I covered mount board with a page from an old handwriting book, painted over it with white chalky paint, coloured with some green & blue cosmic shimmers.


 I cut the letters from plain black card & flower roses from white patterned card roses using my Cricut. I coloured the roses & the two larger flowers with cosmic shimmer sprays glued them and added a pearl in the centre of each using Creative Expressions glue. I coloured the letters by stamping with Versamark then dusting with cosmic shimmer mica powders then went over with Crackle Gaze. I stamped the image using a free stamp from a Papercraft mag (Stamp by Jayne Nestorenkos) coloured with promarkers and sprayed the girls & flowers with Spray & Shine from Crafters Companion to give a sheen
 
I then put it all together onto blue/ green textured cardstock, concertina folded the sides and added acetate for the cover. There is also a stand at the back which I've border punched - just peeping at the bottom.
 I might enter it for a couple of challanges if I can work out how!


Sunday, 24 March 2013


Thanks so much to all the girls for the fab workshop yesterday, really busy, got lots done! You were all so wonderful, and your creations were lovely. Hope you enjoyed the inky play at the end too. xx