

Anyway I've got a bit of a thing about doors at the moment, having seen some amazing examples at Westminster Abbey in London a few weeks ago. And while having my usual brows through some pics on Pinterest I saw a new trend developing in 'Gnome Doors'. Well I'd rather have a fairy in my garden and it seemed the prefect way to use on of the slices of wood. It was very easy too so here's how I made it

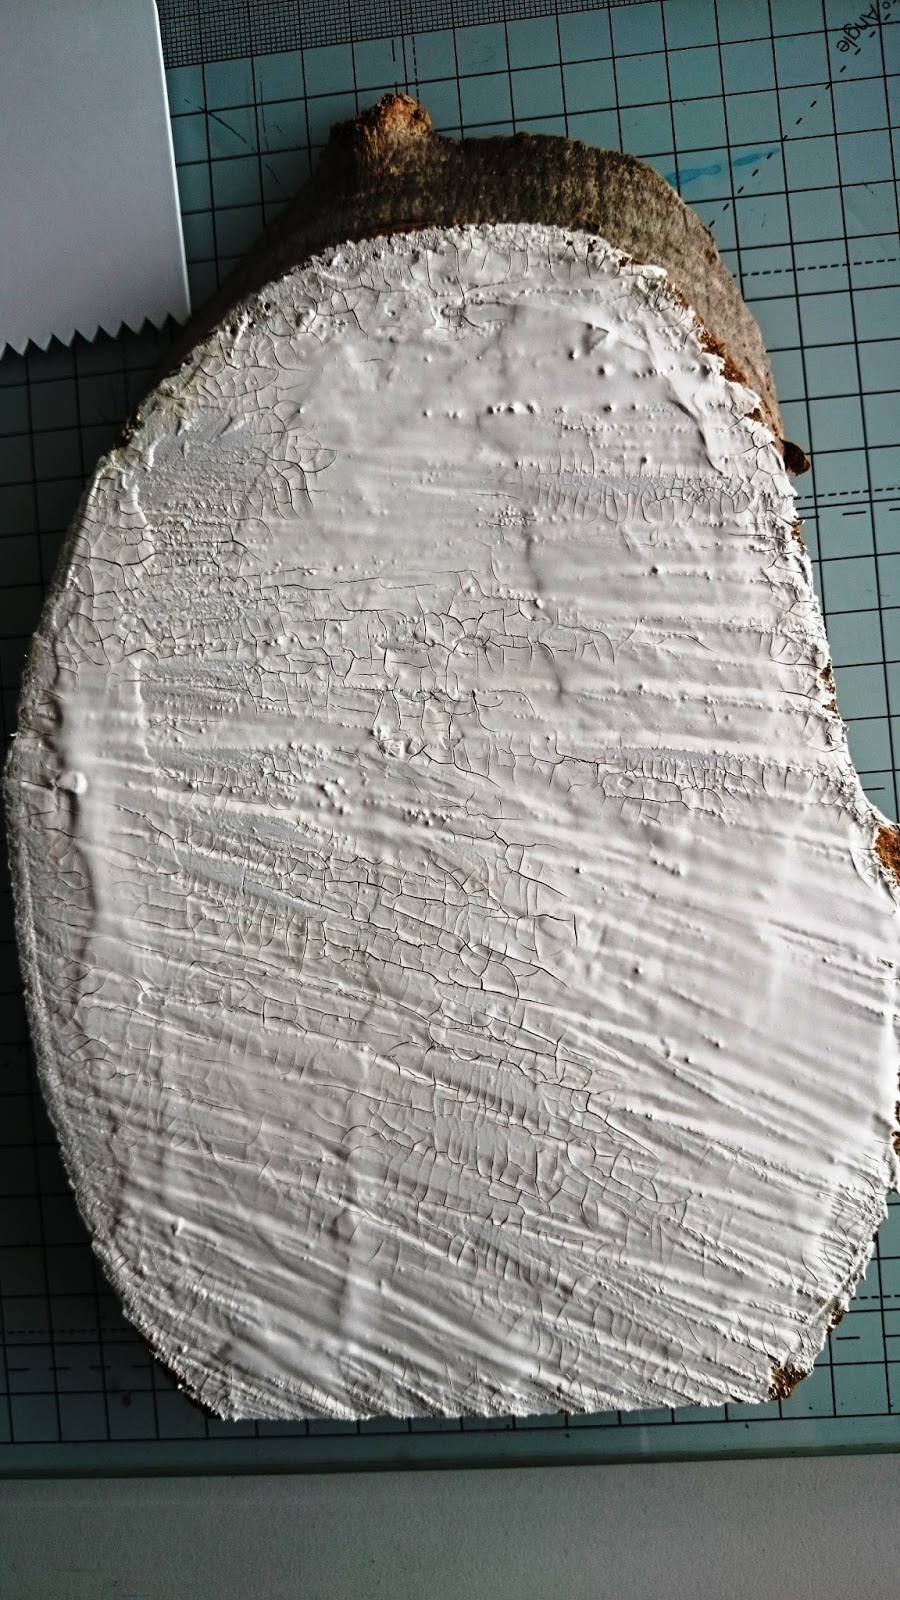
The wood slice was REALLY uneven as you can see from the pics. I spread a thick layer of DecoArt Crackle Paste to even out the surface, but this still left a fab texture underneath as this paste doesn't level like the Crackle PAINT does. These pics show how much I used; like icing a cake. It took a few hours to dry as it was soooo thick, but the unevenness of the layer gave great variations in the size of cracks!


Once the crackle paste was dry I added antiquing cream in the patina and raw umber and a touch of white to emphasis the cracks and add colour. I left this a couple of hours then knocked it back with a damp cloth so it left a beautiful soft effect.


Then I added some gold metallic paint and also some gold Interference Acrylic paint. The first gave a more opaque gold which I smooshed into some of the cracks and wiped off the surface. The interference gave a beautiful sheen when it caught the light. I also then added some other interference paint in the magenta which you can just see flashes of!


So those couple of pics of the fairy door at the top were taken in my studio against the wall with a daisy chain over the top made from punched paper and glamour dust glitter. The other pic was by a redwood tree-trunk in Claremont Gardens.....these fairies like to travel you know and by moving the door they can go anywhere!
Hope you have fun making yours! Suz
No comments:
Post a Comment